


Table saw blades accumulate considerable material and gunk over time.
It’s ugly, and it also impacts the quality of your table saw cuts.
A dirty table saw blade has a burned appearance.
This reduces the saw blade’s sharpness and efficiency, resulting in burn markings and tear-outs on the material being cut.
Cleaning the table saw blade is important for increased blade durability and for smooth cuts.
In this article, I’ll teach you how to clean your saw blade with items that are readily available in your shop.
Things You’ll Need
- Table Saw Blade
- Steel Wool/Scrubber
- Latex Gloves
- Tray (The lid of a 5-gallon plastic bucket would suffice)
- Laundry Detergent/Cleaning solution
- Anti-rust Spray (like WD-40)
Begin by taking out the blade from the table saw. To remove the blade from the table saw,
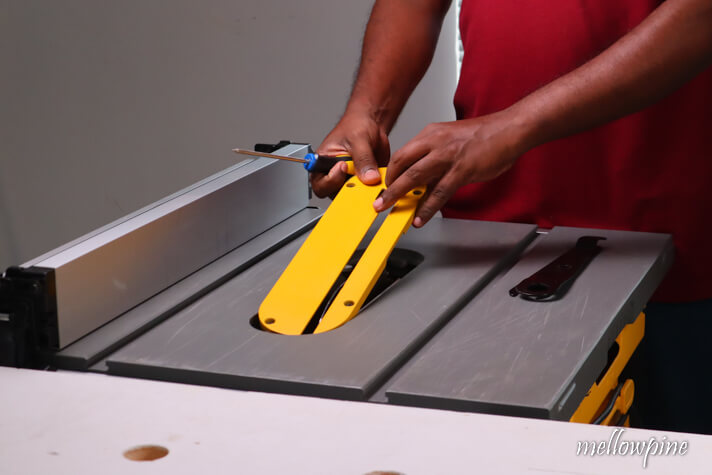
Remove the table saw’s blade guard first. (If you have it installed).
The throat plate may now be taken off.
Take the throat plate off the table saw by unscrewing the screws keeping it in place.
Then, using the crank, lift the blade high.
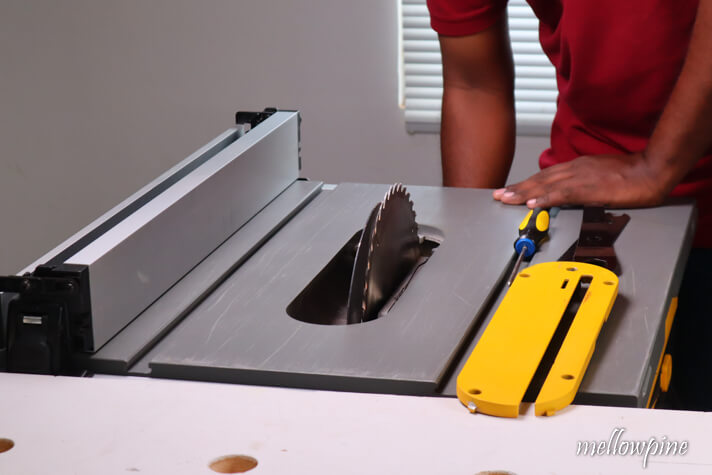
You may need to remove the riving knife first if your table saw’s blade is linked to it. The riving knife does not need to be removed in some saws.
Loosen the nut that holds the riving knife to remove it.
Then, using a wrench, take out the knife by pushing down the locking mechanism within (at the bottom of the riving knife).
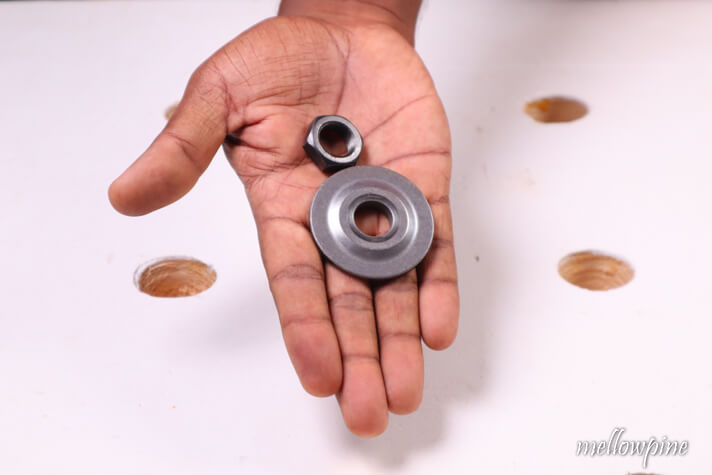
Take two wrenches. One wrench should be used to hold the arbor while the other is used to release the nut.
Hold the wrenches in such a way that force is applied in opposing directions on both sides.
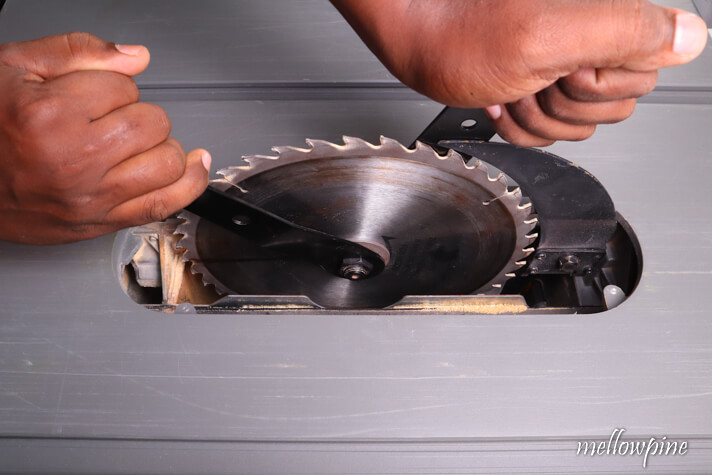
Once the nut is free, grab the arbor nut with your thumb and index finger and carefully spin the nut.
The blade may now be removed when the nut and washer have been removed.
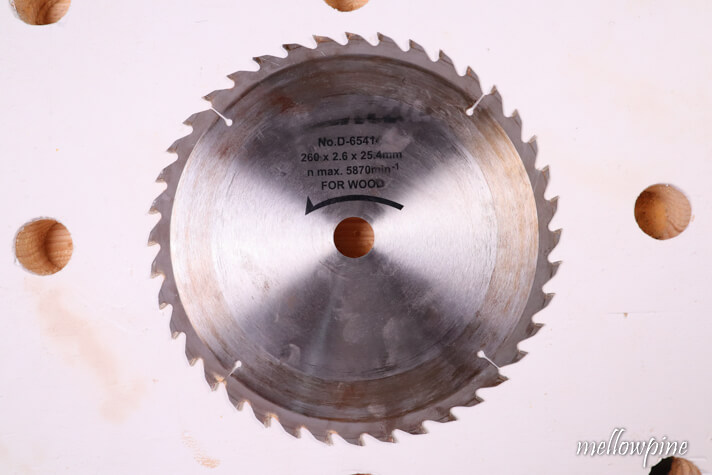
Remove the blade from the work surface and set it aside.
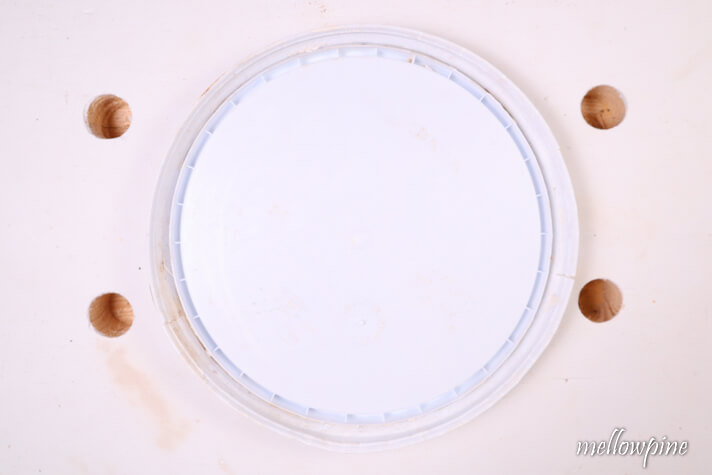
A 5-gallon bucket lid would make an excellent container for storing the blade.
The cleaning solution may be kept in the lid while the blade’s diameter is contained without leaking.
The lid has a little dip in the center that will let you remove the blade from the lid using the blade’s arbor hole.
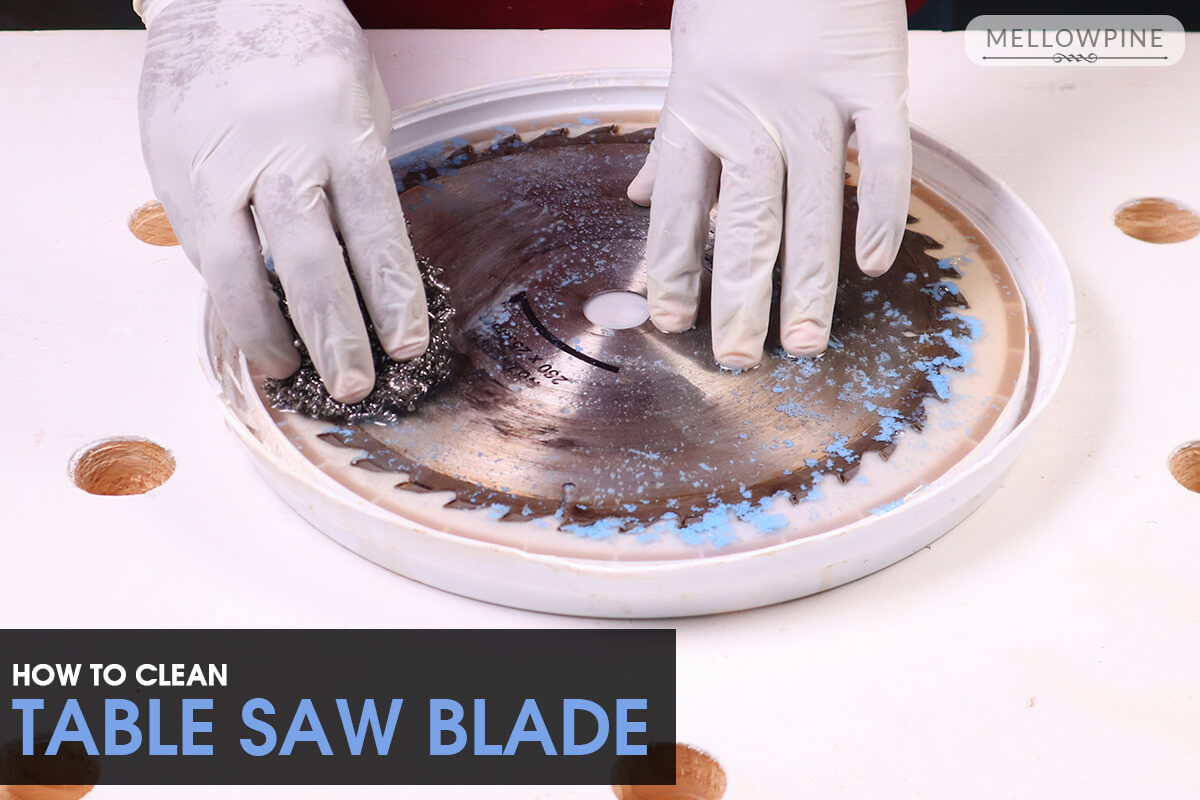
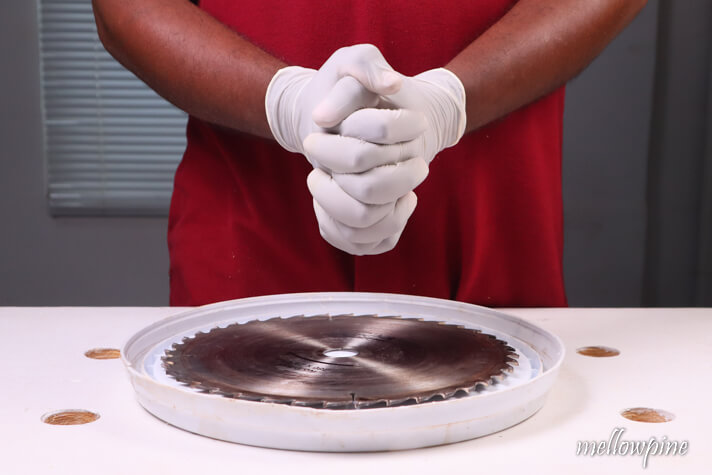
First, place the lid/tray on the table.
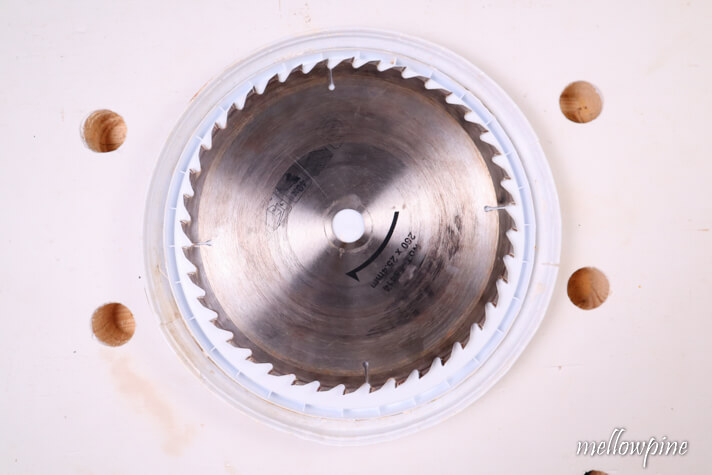
Now, keep the blade in the lid.
To protect your hands from the cleaning material, put on disposable gloves.
For this stage, you can use any laundry detergent or cleaning solution.
Fill the lid with the cleaning solution. Make sure nothing spills outside the lid.
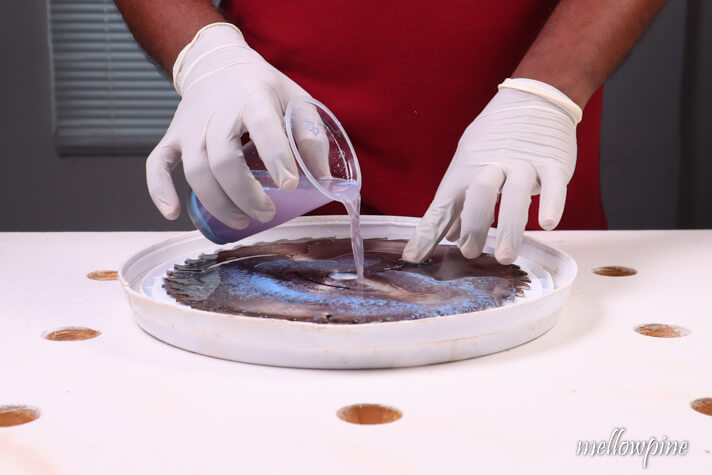
Allow 5 to 10 minutes for the blade to soak in the cleaning solution.
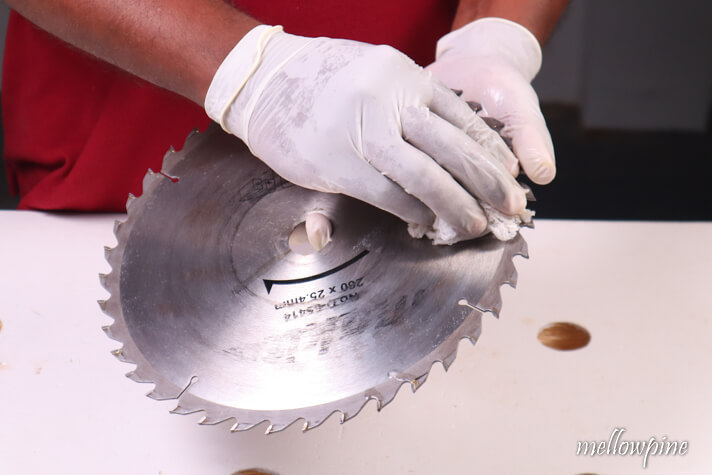
Remove the blade and brush away the glue and debris using a scrubber or steel wool, revealing a cleaned blade.
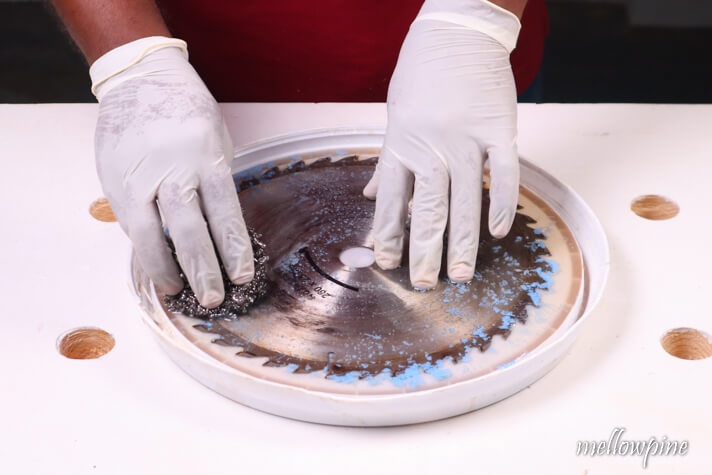
Scrub the other side of the blade as well.
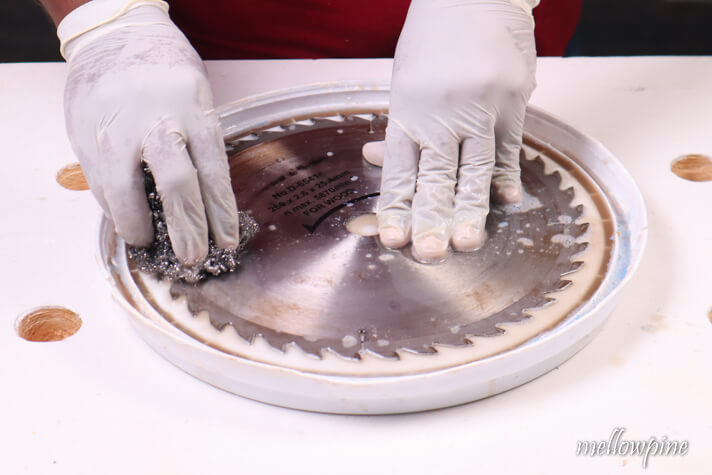
Apply any anti-rust or water displacement spray on the blade after rinsing it with water (WD-40).
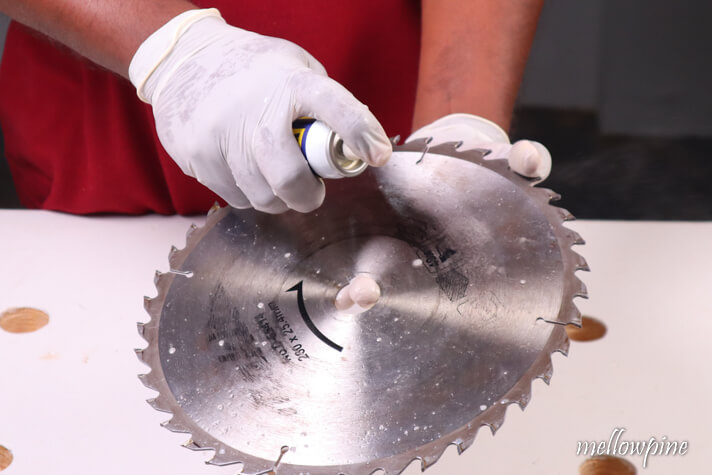
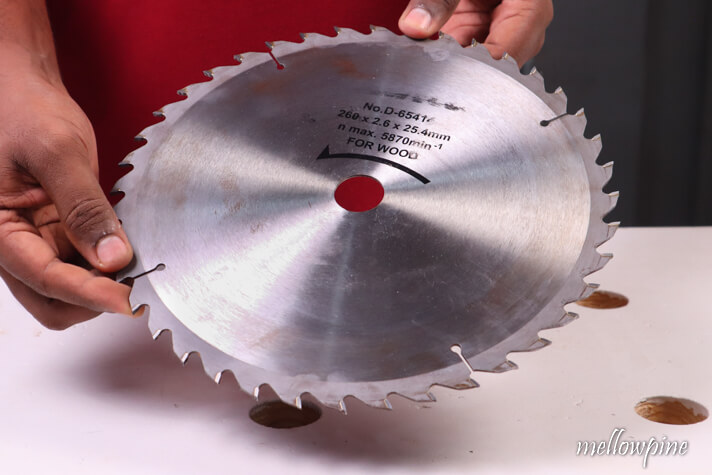
Allow the blade to dry after wiping it clean.
EExamine the area for any residual dirt or debris. If there are any remaining, continue the process until the blade is completely clean.
You might be interested in these:
Tips for Cleaning Table Saw Blade
- Ensure the table saw is unplugged before changing the blade.
- Never use water to clean saw blades as they rust the blade over time, rendering it useless.
- Using a cleaning solvent is permitted as long as its not too acidic or basic.
- If you are using water to rinse off the blade, remember to use an anti-rust solution like WD-40 to prevent corrosion.
- Sharpening of the blade must always be done only after cleaning the blade is done.
- Do not drop the blade as it will chip or dent the teeth upon impact.
- Check the power chord for cuts along its length. if the insulation is exposed then change the power chord.
Frequently Asked Questions (FAQ)
Will vinegar clean saw blades??
Vinegar can clean table saw blades. Pour some vinegar onto the blade and completely keep it immersed for 6 to 9 hours. The rust will be entirely removed and but vinegar will likely leave a greyish tinge on the blade.
When should I change my table saw blade?
Look for worn out, chipped, broken, and missing teeth, as well as chipped carbide tips, to indicate that a circular saw blade needs to be replaced. Examine the wear line of carbide edges with a bright light and magnifying lens to see whether it’s starting to dull.