


If you’re planning an epoxy-poured table or some epoxy-based project, you might be wondering whether you can plane epoxy.
You can plane epoxy, but it is tricky due to its soft nature and low melting point. The heat generated while planing can melt epoxy’s surface, causing the cutters to gum up. Plane them at a high feed rate to reduce heat buildup and use properly cured hard epoxy.
What aspects should you take into account while planing? What are the alternatives to planing epoxy?
This article discusses planing epoxy by examining various factors influencing the planing process, its workflow, and some alternatives.
MellowPine is reader-supported. When you buy through links on my site, I may earn an affiliate commission at no extra cost to you.
Planing Epoxy: 7 Things to Consider
Due to its material properties, epoxy requires significant care and monitoring during planing, so the surface does not wear out.
You can plane epoxy either using a hand plane or a power plane. Hand planing jobs require more effort and time to complete.
| Factors | Details |
|---|---|
| Tool ergonomics | Should have a tight grip on the tool |
| Blade | Use sharp blades at a low cutting angle |
| Workpiece support | The workpiece should be firmly supported |
| Moisture content | Only work on properly cured epoxy |
| Epoxy surface | Should be free from any contaminants or chemicals |
| Periodic maintenance | Clean the tool after each long cut |
| Electrical factors | Liquid on epoxy can cause a short circuit |
Tool Ergonomics
Always ensure that the plane you use is ergonomic and easy to handle. Padding the plane gripper with foam or rubber makes it easier to hold and use.
It mainly applies to hand-operated manual and power planers.
Blade Depth and Sharpness
Ensure that your plane’s blade is sharpened before use. A grindstone can be employed to sharpen the blades each time before use.
If you need a deeper cut, use a higher blade angle as it cuts deeper, and for minor surface cuts, use a low blade angle.
The operation manuals of your planing tools will have information on the optimal range of blade angles for different materials.
One of the significant factors to consider when planing epoxy is the cutting depth/gauge depth.
It should be kept as minimal as possible so that the blades do not wear out quickly and the material does not deform or melt due to the high frictional heat developed while planing.
Workpiece Support
The workpiece should be firmly supported and fixed onto the worktable so that during the planing operation, the surface remains still, and the operator can stroke the surface efficiently.
A loosely clamped epoxy workpiece will undergo vibrations and uneven planing, ultimately damaging the workpiece’s foundation and surface.
Moreover, proper supports and clamps ensure the user is free from any potential injury from a loosely clamped workpiece.
For instance, if a workpiece suddenly slides forward toward you, it can cause injuries.
Moisture Content
Keep the epoxy workpiece away from any moisture as that may seep in, causing visual distortion of the surface while weakening the epoxy workpiece’s strength.
Epoxy Surface Quality
Epoxy should be free from contaminants or chemicals as they may damage the cutting blade and infiltrate the surface cavities.
Also, the epoxy workpiece should have a roughly horizontal surface so that planing can evenly and uniformly reduce the thickness of the workpiece and flatten the surface.
Such workpieces also will only require less planing.
Tool Maintenance
Perform periodic maintenance of the planing tool to remove any material residue that can hinder the tool’s performance or cause damage to the workpiece surface.
Electrical Factors
A power planer needs a steady supply of electricity to operate.
Only work on properly cured epoxy. Else the water content on them can cause electrical hazards.
How to Plane Epoxy Perfectly: Step-by-Step
Planing epoxy is a multi-stage operation that requires proper care and planning.
Epoxy workpieces are primarily made of wood and epoxy resin coating, but they can sometimes be fully epoxy based.
Checking ambient temperature
When working on epoxy, ensure that the outside temperature is moderate. An ambient temperature of around 77 °F (25 °C) is optimal for planing epoxy.
Temperatures above that can slowly melt the epoxy, affecting the planing process.
Similarly, if the temperature is too cold, planing might crack and chip off the epoxy surface, seriously damaging it.
Preparing the tools
Blunt blades can’t make effective cuts on an epoxy surface as it chips and fractures the epoxy coating. So always plane using sharp tools.
Rub the planing tools against a rubber mallet or a hardwood board to remove any debris or material residue stuck to the blades.
Pre-sanding the surface
Sanding the wood will smoothen the surface and create a cleaner layer for the epoxy resin to adhere.
Initially, use medium grit-size sandpaper, then move on to a fine grit-size. You can use wax or butter soap for better lubrication during the process.
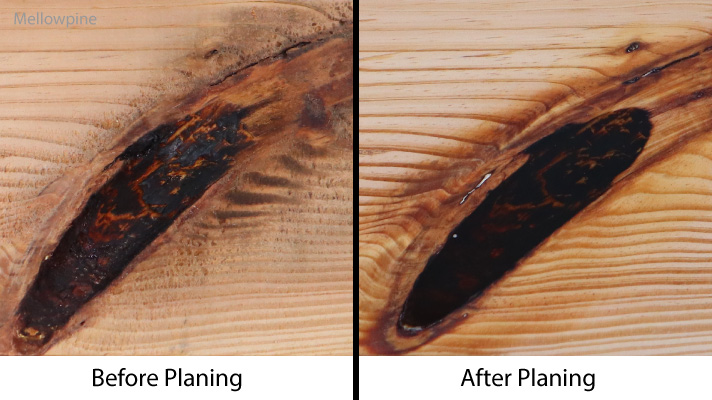
Perfecting the epoxy workpiece surface
Ideally, the epoxy workpiece’s surface should be smooth with no impurities or cavities.
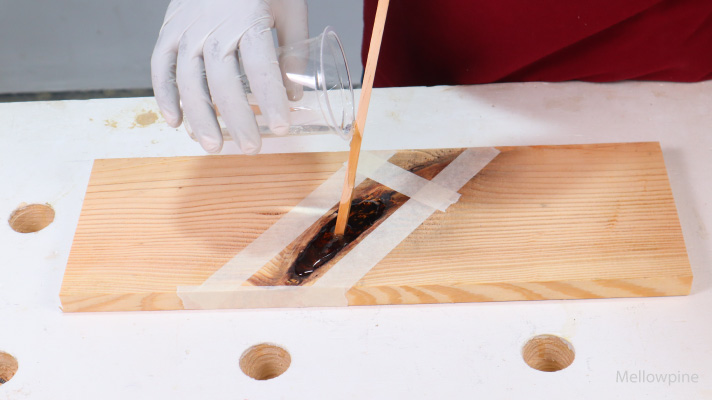
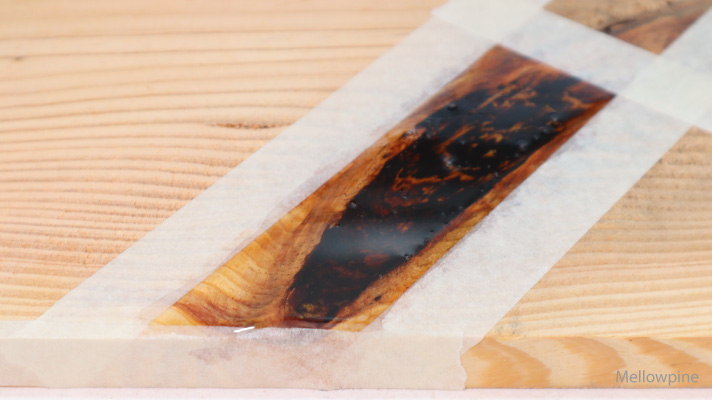
If they have cavities, apply a layer of epoxy resin over the workpiece surface using a brush or a roller and spread it out evenly.
In this way, any cavities will be filled by the newly applied epoxy layer, resulting in a smooth and flat surface free from any impurities.
Planing the epoxy workpiece
Once the workpiece is dry and ready, you can perform the planing job. You can use a planing tool of your choice.
When using a hand plane, gently move it back and forth on the epoxy surface during each stroke.
Between the job, wipe the surface to remove any excessive debris. They can get in between the cutter and workpiece surface affecting the planing finish.
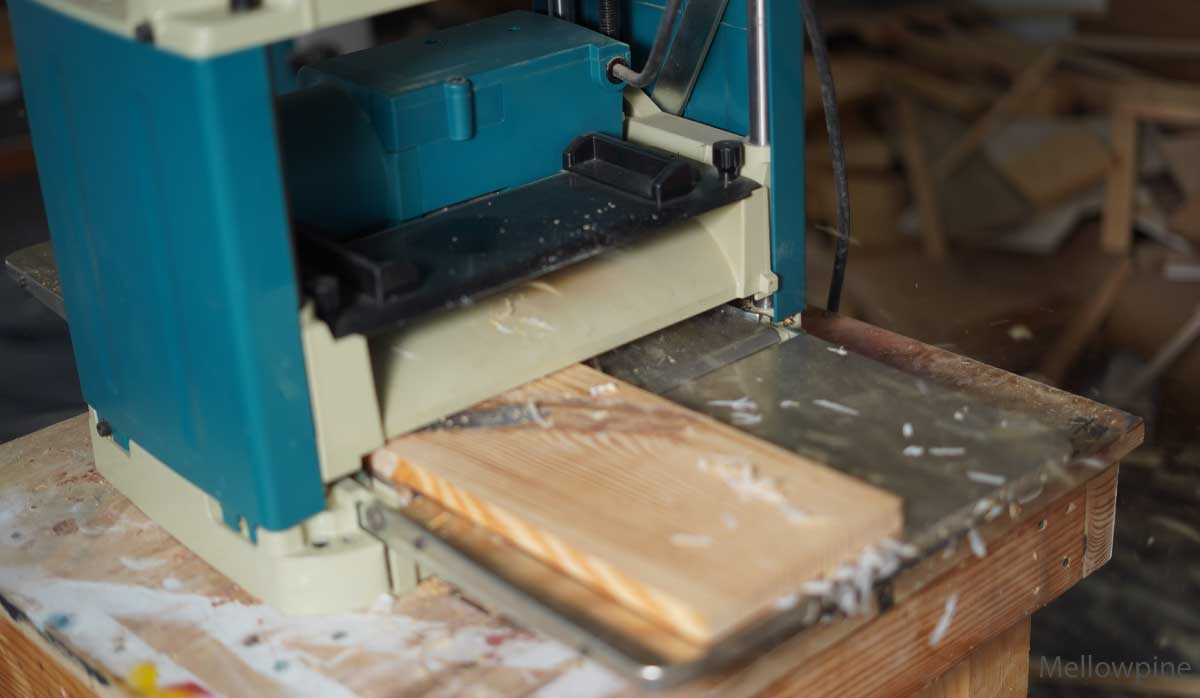
If you use a power planer, gently feed the workpiece into the planer and slowly obtain the workpiece from the other side.
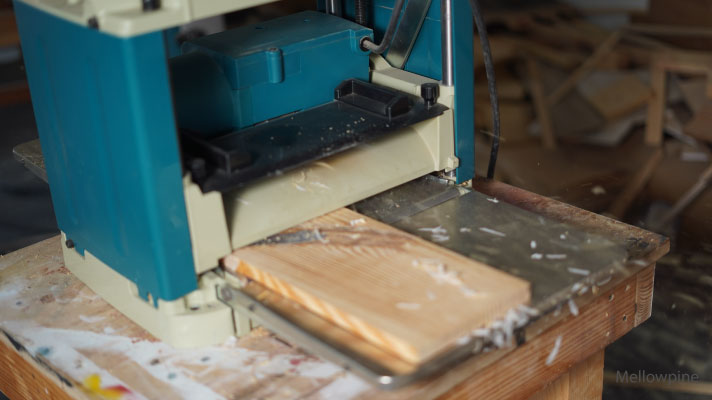
Wipe off the surface with a clean cloth and feed it into the planer until you get the desired result.
Set the gauge depth as minimal as possible. For deeper cuts, increase the number of passes.
Also, to obtain an even cut, follow the grain structure of the workpiece while planing the epoxy.
Curing the surface
After planing, the epoxy workpiece surface will be slightly hot due to the frictional cutting action. So allow it to cool down for some time so that it solidifies.
I recommend you give it a curing time of up to 8 hours, after which you obtain a durable, smooth, and shiny epoxy resin surface.
Common alternatives to Planing Epoxy
There are many alternative methods to planing epoxy.
Sanding

Sanding process utilizes a sanding tool like sandpaper to remove the surface material. Most planing operations on epoxies are followed by a sanding job.
Sanding has a low material removal rate which is not very effective when slicing off material from a workpiece to reduce its thickness.
It is a long process and can eventually wear out the sanding tool and melt the epoxy surface.
Moreover, it produces small-sized dust-like debris, which is harmful when inhaled.
A sanding tool like a drum or belt sander with a higher grit number can remove more imperfections or defects from the workpiece surface.
From a hobbyist point of view, sanding is the easiest method among the alternatives.
Power Tools
A power tool like a chainsaw, jigsaw blade, or circular blade, can also reduce the thickness of the epoxy workpiece by cutting away material, but it is the least preferred alternative.
These techniques will quickly raise the temperature around the tool and material interface, causing the epoxy resin to melt.
Moreover, high RPM and deep penetrating cutting blades will chip away the material, causing cracks and brittle fractures.
If you ever opt for this method, perform it at a low RPM (speed) with a minimum cutting depth on each pass.
Manual Tools
You can use a manual tool, for instance, a hacksaw or a cutting blade, to remove some material from the surface.
It will be a long and tedious process and can result in an uneven surface with an unwanted slope of rugged texture.
From a hobbyist perspective, this method is the cheapest but requires the most effort.
Final Thoughts
Planing epoxy is a demanding task that requires extra caution, but with some tests and tryouts, you can easily plane them.
When they are correctly planed, they have an appealing surface texture and are durable.
The planing process produces a lot of debris. Timely remove it to get a smooth cut all over the surface.
In most cases, even after a planing job, you’ll have to follow it with sanding and apply a clear coat for a better surface finish.
You might also like reading,
Frequently Asked Questions
Can you perform filing on epoxy?
Yes, you can file epoxy in moderation, as excessive filing can heat up and damage the epoxy surface and the file blades.
Can epoxy be used in high-load applications?
Yes, you can use epoxy in high-load applications as it can withstand a tensile stress of up to 4400 psi. Beyond that, the epoxy object will undergo brittle fracture.
What are the safety precautions required when planing epoxy?
The safety precautions required when planing epoxy include wearing face masks, eye goggles, gloves, safety boots, and helmets. You can also wear a face shield for better protection.
What is meant by the grain structure of epoxy?
The grain structure of epoxy is defined by the molecular structure and orientation of the molecular layers within the epoxy workpiece.