


Cutting a thick piece of wood with a circular saw can appear challenging due to the sheer size of the wood.
However, it is possible to master this by following a set of simple steps.
Things You’ll Need
- Circular Saw
- Speed Square
- Rip Fence (a straight edge or even straight plank of wood is acceptable)
- Sacrificial board (MDF or Plywood will do fine)
- Pencil
- Masking Tape
- Hand Saw
- Quick Grip Clamps
Video-Cutting Thick Wood with Circular Saw

Subscribe to Mellowpine_DIY on YouTube for getting our latest DIY videos in your YT feed- Subscribe to Mellowpine YouTube Channel
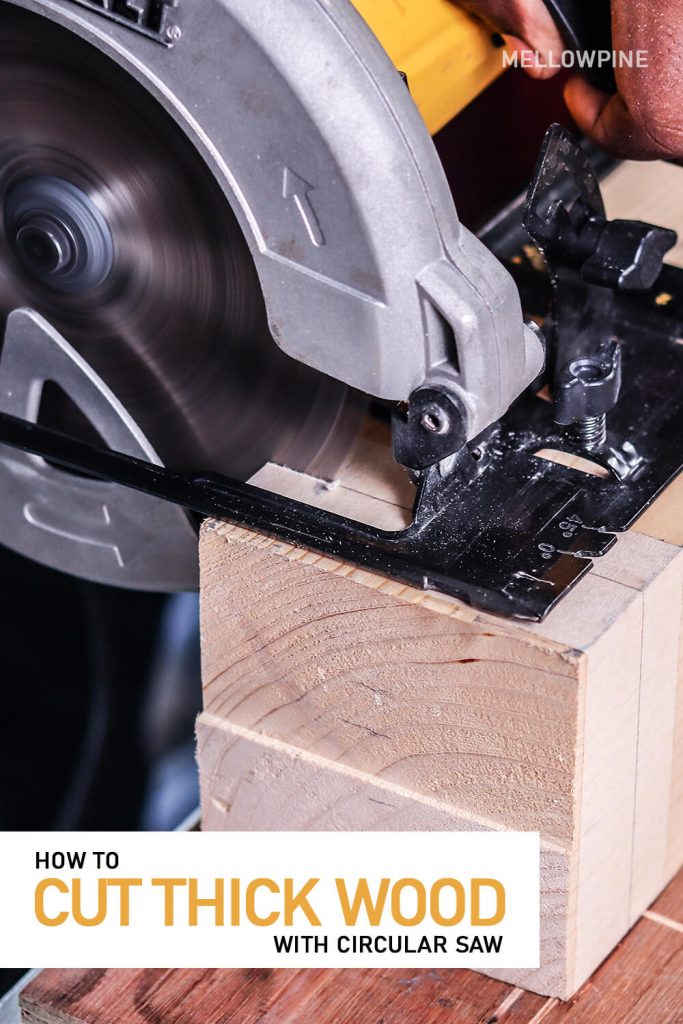
How to Cut Thick Wood with Circular Saw
Begin by placing the thick piece of wood onto the work surface.
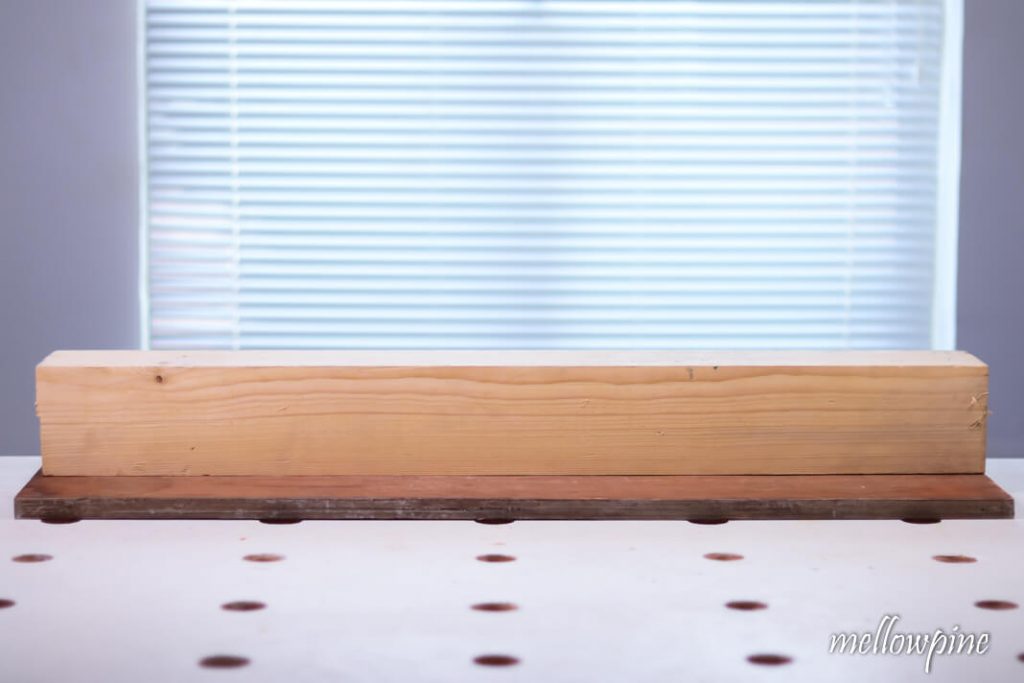
A sacrificial sheet is optional in this case as the wood is thick enough to handle the depth of the blade.
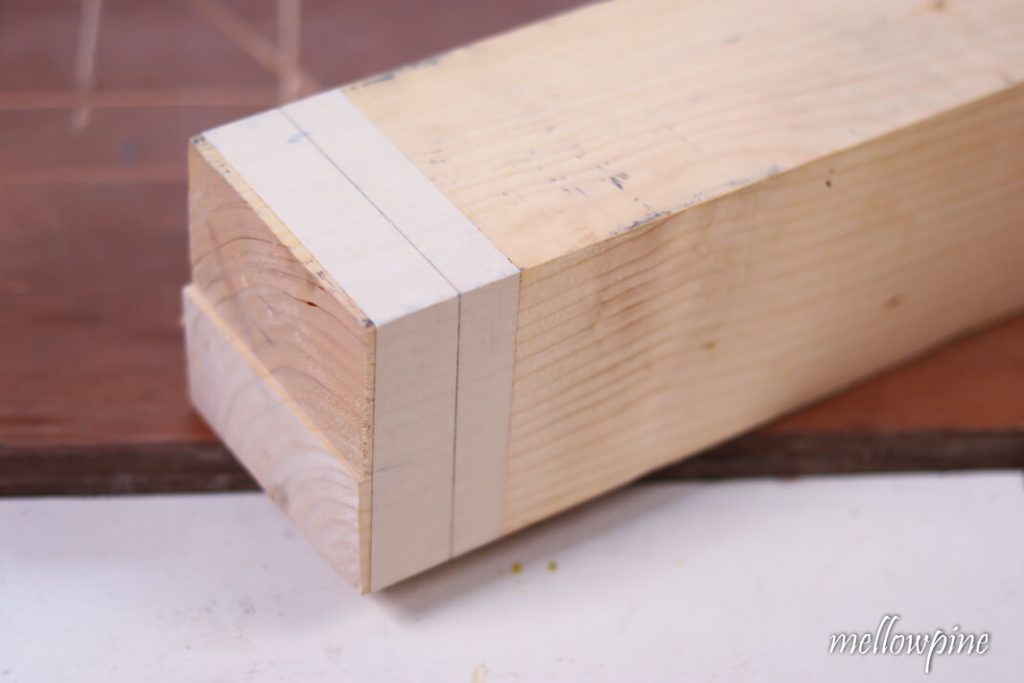
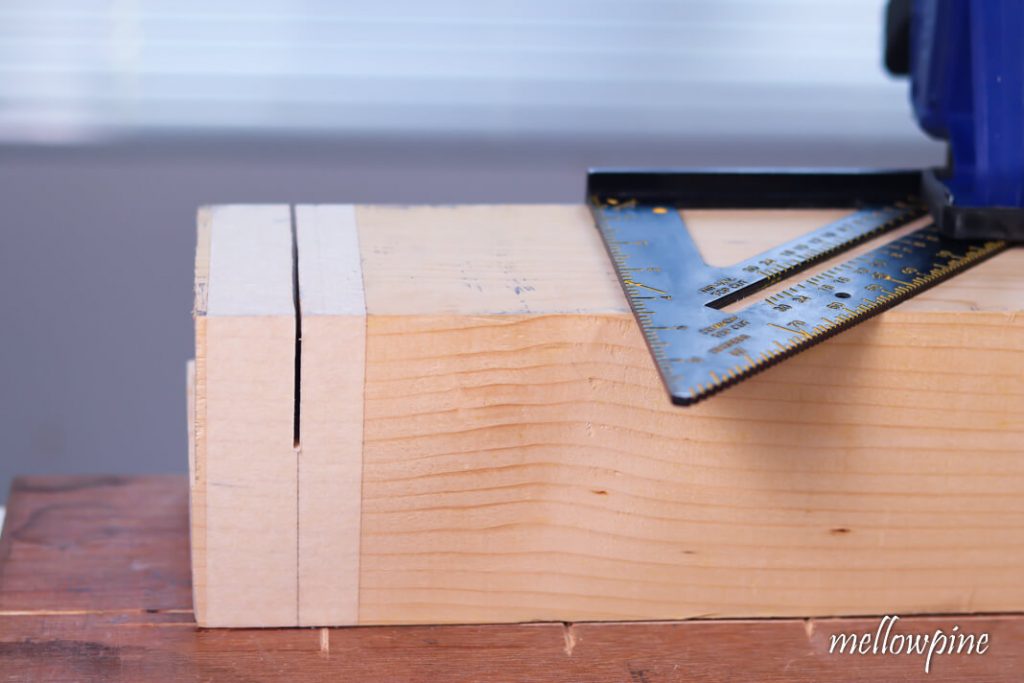
Use some masking tape, cover all four sides of the wood before marking on the tape.
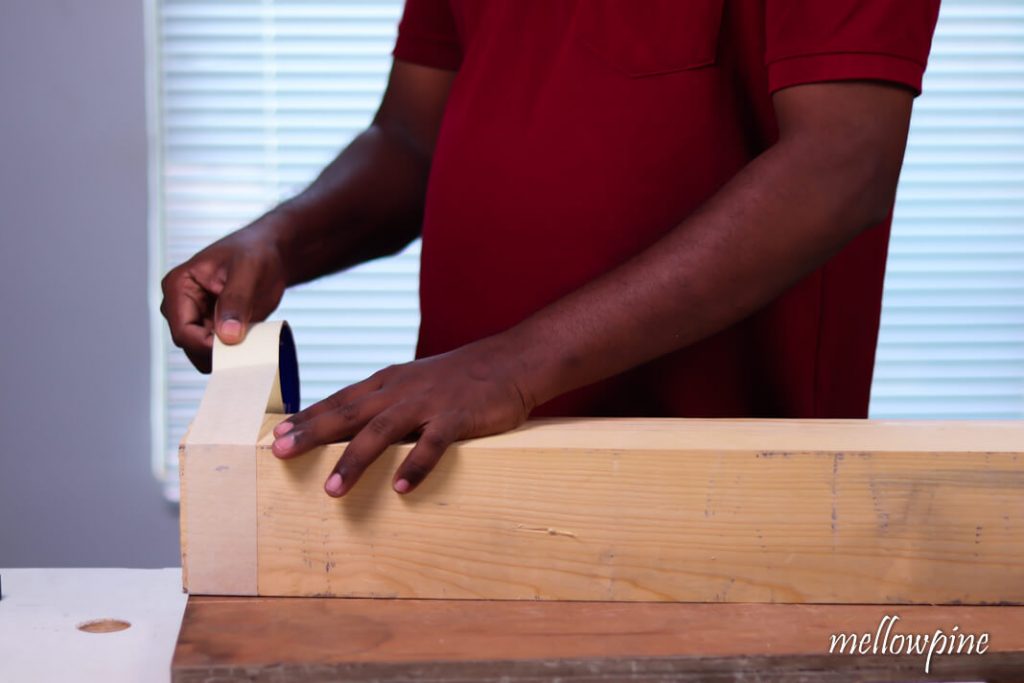
The masking tape will prevent splintering of the wood.
After the masking tape is fixed, mark line of cut using a carpenter’s pencil and a speed square.
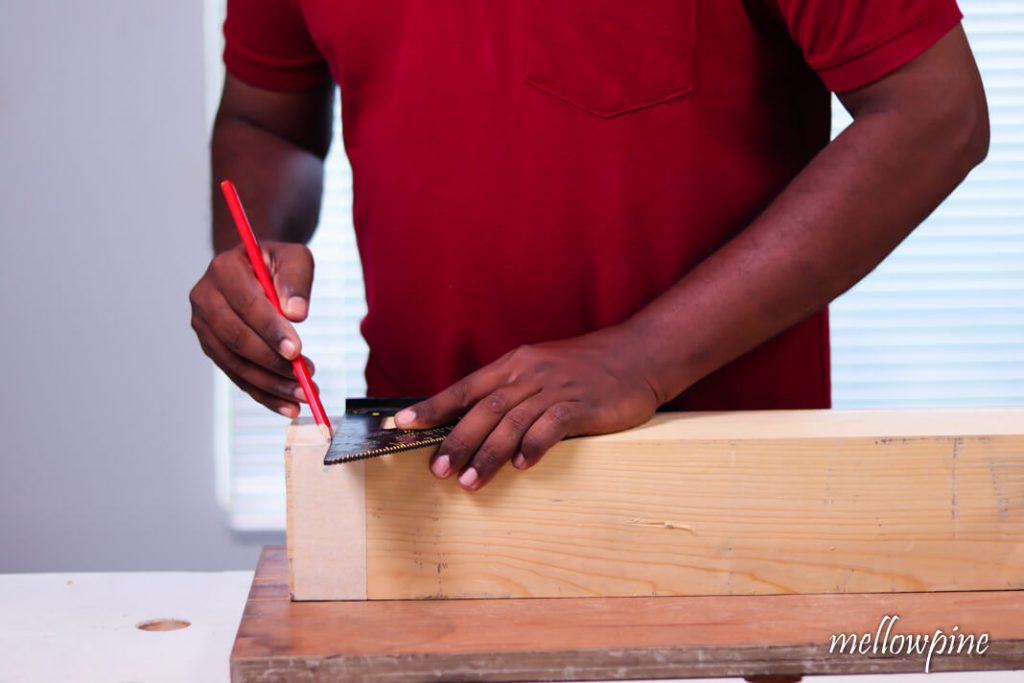
After marking the wood on one side, rotate the wood once and continue marking on that side.
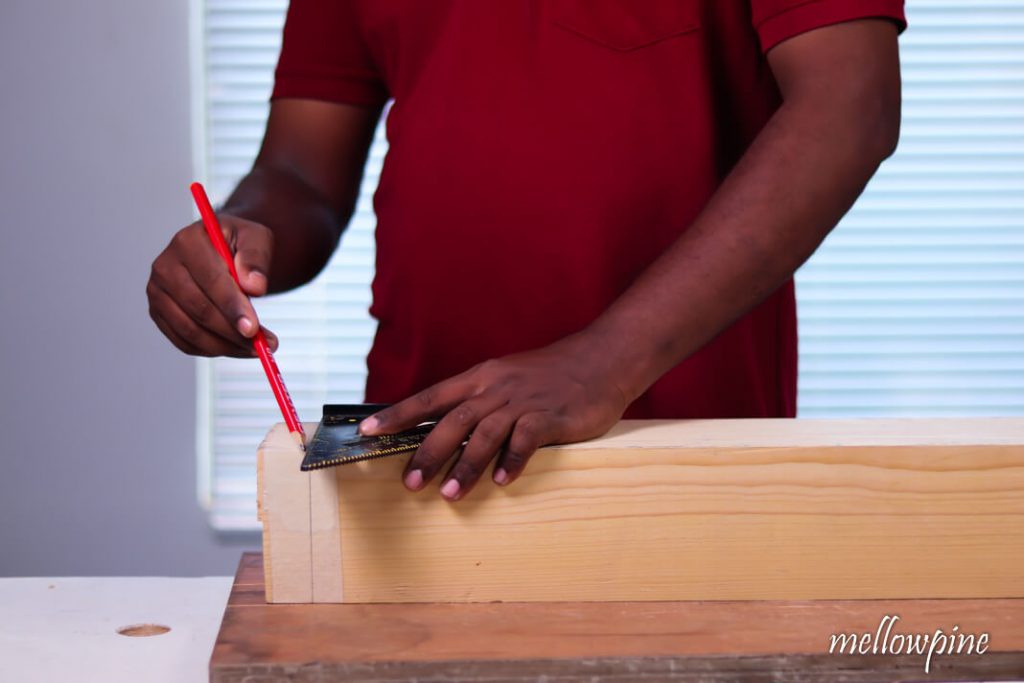
Mark on all four sides of the wood.
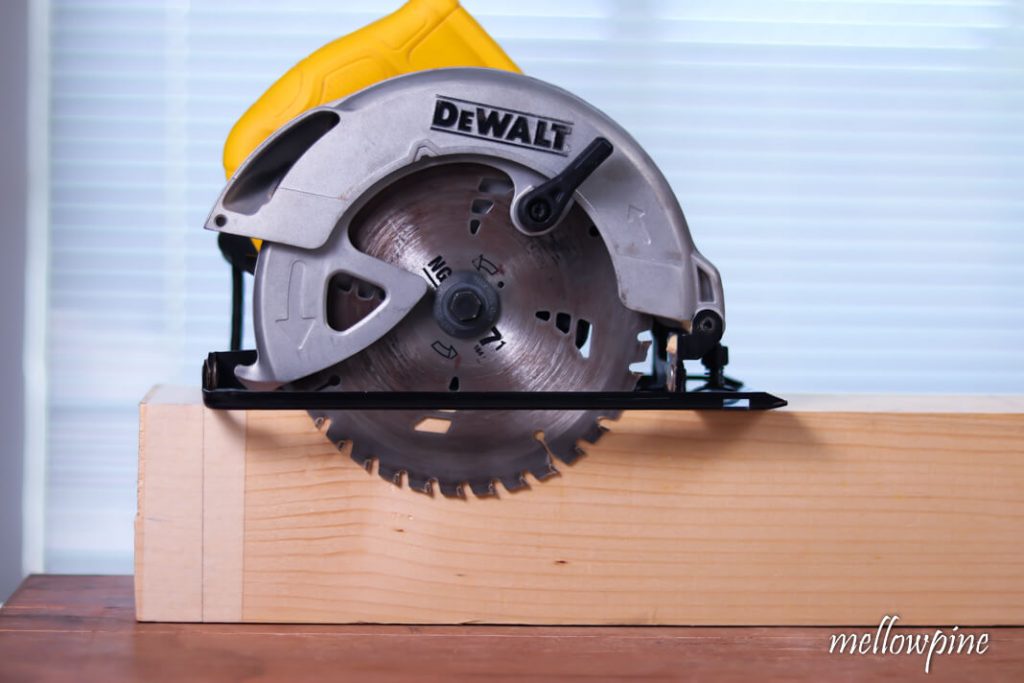
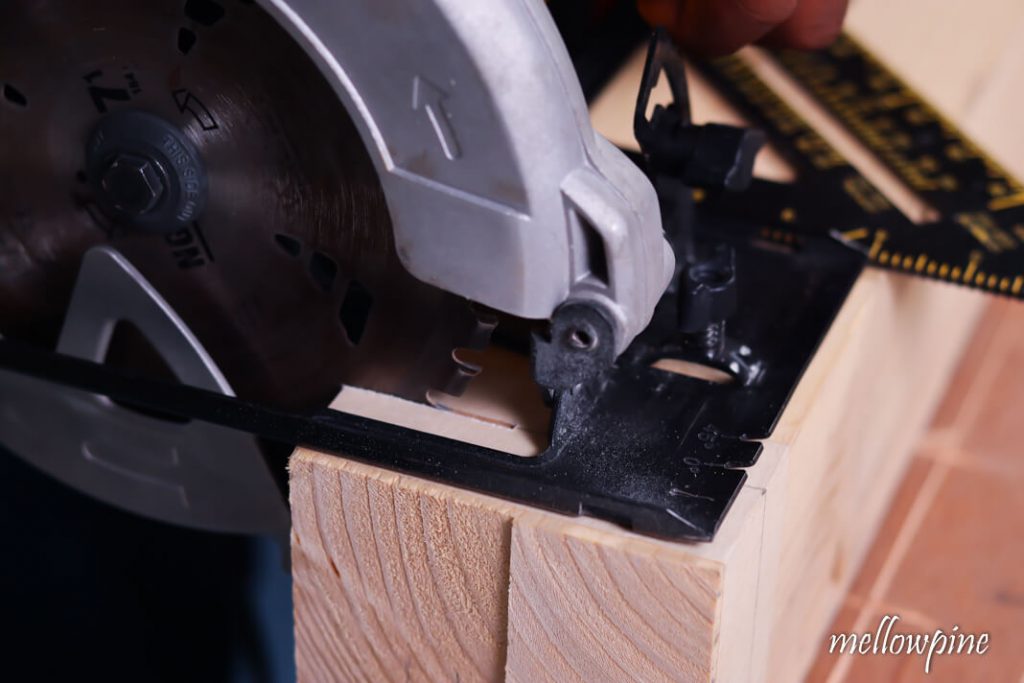
Set the maximum blade depth on the circular saw.
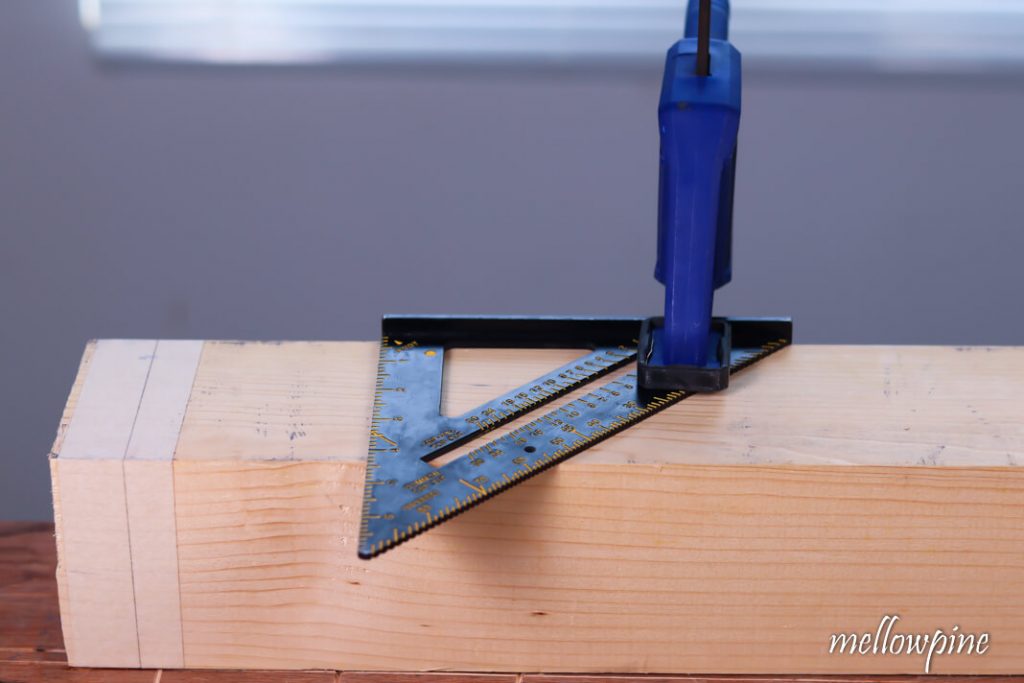
Measure the offset from the edge of the shoe to the blade of the saw.
Transfer the offset distance onto the line.
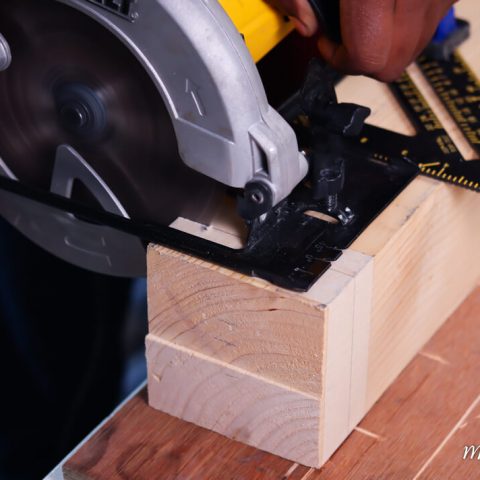
After the offset is marked, use the speed square and align the saw blade with the mark.
Clamp the speed square onto the wood using a quick grip clamp.
Begin sawing along the mark with the blade at full depth.
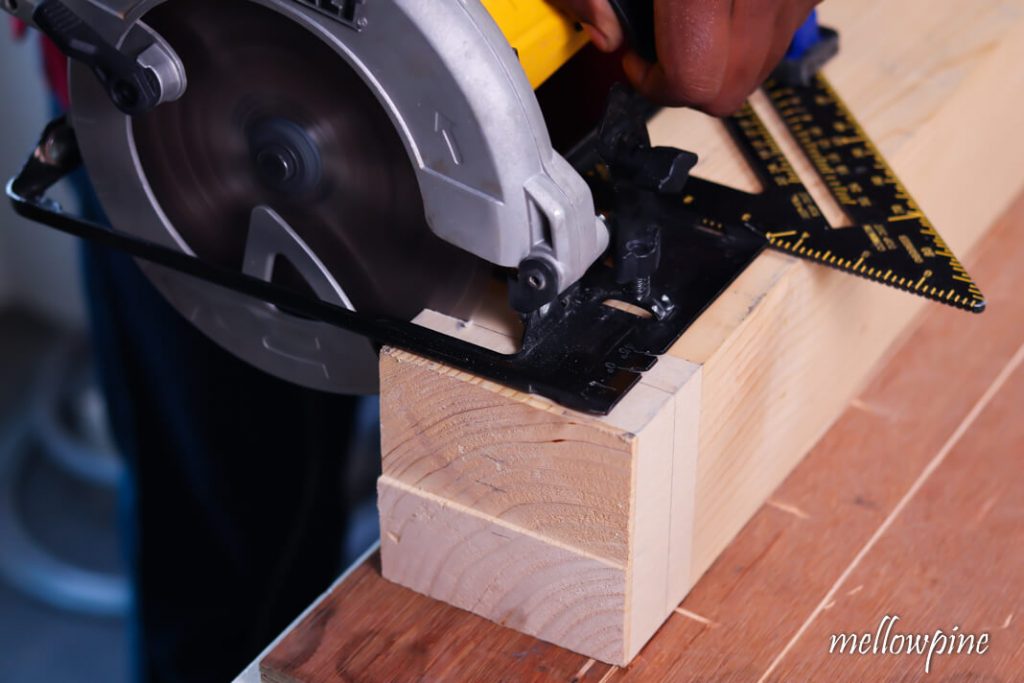
After sawing through one side of the timber, flip the wood piece by 90 degrees..
Using the notch of the first cut, align the blade again and continue cutting.
Continue this process until all four sides are sawed.
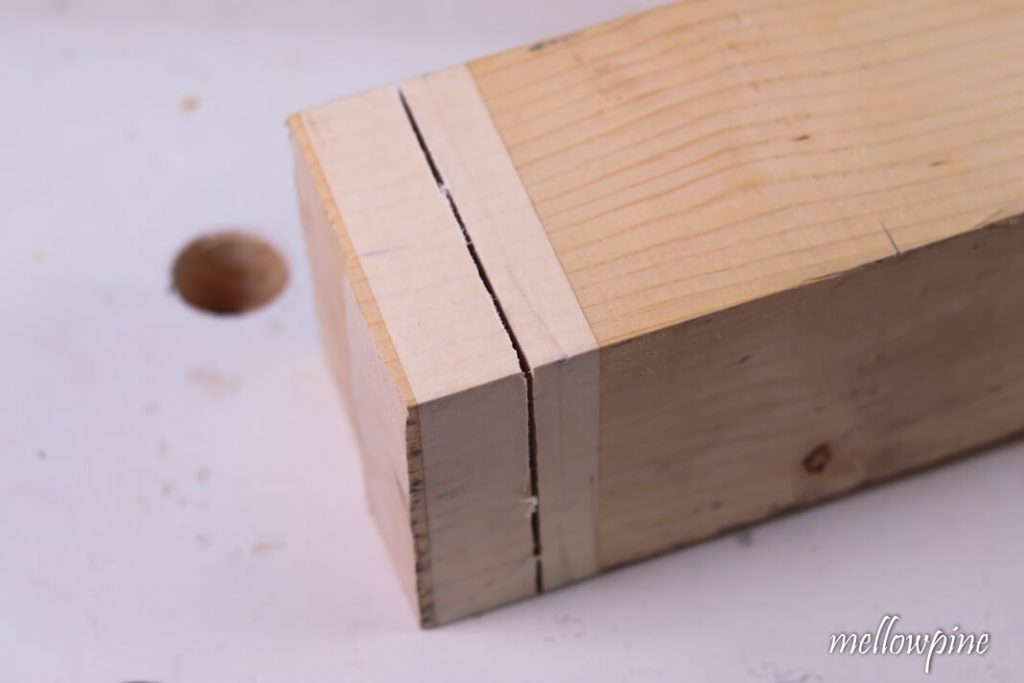
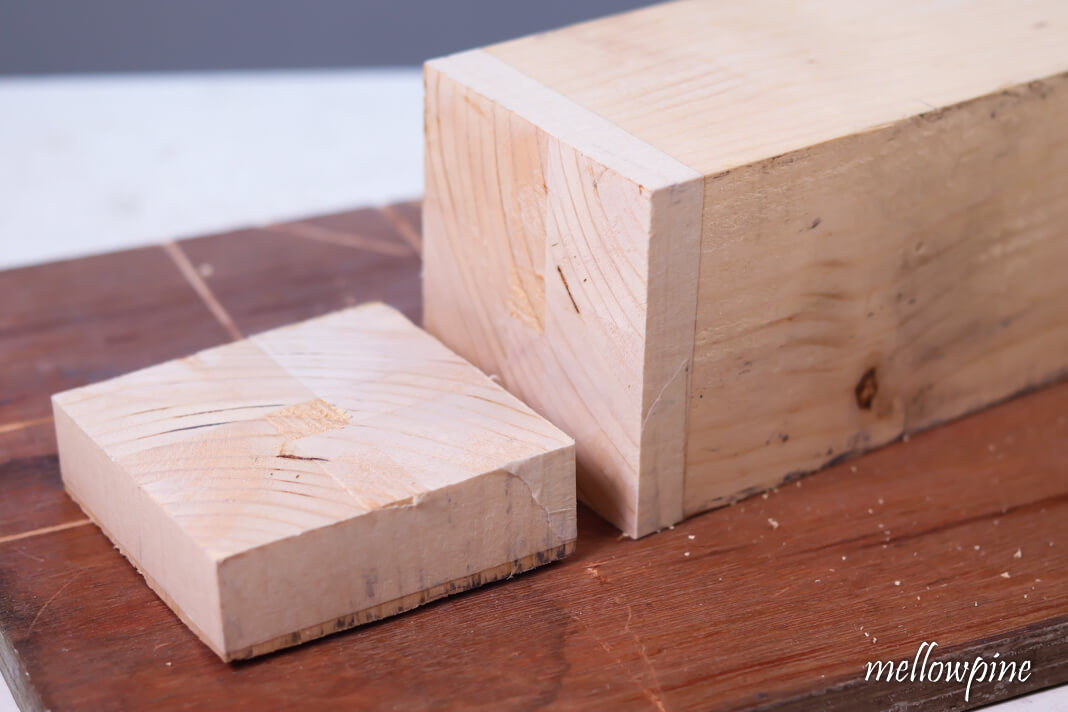
If the pieces don’t separate completely, then use a hand saw to cut the rest of the thickness and free up the piece.

Insert the hand saw into the notch and saw while keeping your hand steady to avoiding swerving from the path.

With this step, you have successfully completed cutting a thick piece of wood using a circular saw.
You might be interested in these:
If you liked this post, consider pinning to your DIY/Woodworking Board for viewing later.
Tips for Cutting Wood Using a Circular Saw
- Before making any adjustments, make sure the saw is unplugged.
- Make sure depth is set all the way down before you begin adjusting.
- While marking, never mark just as a point. Instead, mark it as a ‘tick’ mark or a ‘crow’s foot’ mark. Doing so helps in identifying the point to be cut easily.
- Stay away from the saw while cutting.
- If the piece completely seperates from the wood, let it fall. Never try to catch it while holding a runnning saw in your hand.
- Never stay right behind or too close to the running blade to avoid injury in case of kickback.
- Kickback is extremely dangerous and must be prevented at all costs.
- Using masking tape before drawing the mark on it can help reduce burrs to lend a more pleasing finish.
- Make sure to cut outside of the line, so the wood piece that you intend to use has the correct dimensions.
- Use a rasp to clean and smoothen the cut after sawing. Alternatively, A hand sander or sanding paper can also get the job done.
- Once the saw is turned on, keep it steady but never try to force it back in case it veers off.
- Using excessive force will create pinch points in the wood leading to damage for both the user and the saw.
How to Cut Thick Wood with Circular Saw
This DIY guide will teach you how to cut a thick piece of wood like a 4x4 or 6x6 using a Circular Saw
Materials
- 1. Wood for cutting
- 2. Sandpaper
Tools
- 1. Circular Saw
- 2. Speed Square
- 3. Clamp
Instructions
- Fix masking tape in the area where you wish to cut- to prevent splinters.
- Draw the line of cut on all 4 sides using a speed square and pencil.
- Set the depth of the circular saw blade to the maximum.
- Use a speed square as the straight edge for guiding the circular saw.
- Clamp the circular saw such that the blade aligns with the line of cut.
- Start the saw and cut the first side while keeping the saw pressed against the speed square.
- Using the notch of the first cut, cut the adjacent side.
- Repeat this process for the other two sides as well to cut on all 4 sides.
- If the offcut is still attached to the rest of the wood, use a handsaw to cut and detach it.
- Sand with rasp or sandpaper for finishing.
Notes
If you don't have a rip fence, use a straight edge.