


Aligning the mirrors of a CO2 laser can often be a frustrating task as it is difficult to perfectly reflect the laser off a series of mirrors and position it on the workpiece.
But don’t fret! There is a simple hack that you can use to precisely calibrate the mirror alignment to get accurate results.
I’m Unni, and I’m a laser engraving expert. In this guide, I will explain how you can easily align the mirrors and ensure that you get a perfectly positioned laser beam on the workpiece.
I’m demonstrating this in this guide with my Xtool P2 CO2 laser, but the steps are similar for other CO2 lasers too.
How to Check the Mirror Alignment

To check the mirror alignment, you need some masking tape, a Wrench or an Allen key (based on the mirror adjustment mechanism provided on your laser), and a scrap piece of material.
Step 1: Set the maximum laser power to the lowest possible value to avoid accidents during the calibration (most Chinese CO2 lasers have a minimum firing power of 15%, i.e., the laser does not fire below that power).
Step 2: Apply a piece of masking tape over the circular frame on the mount of each focusing mirror and gently press it to indent the circle on the tape.
Step 3: Fire a pulse of laser at the lowest possible power so that it produces a burn mark on the masking tape.
Step 4: Analyze the position of the mark on the masking tape with respect to the circular indent of the frame produced on it. The laser should burn at the center of that circular indent.
Step 5: If the laser does not burn the tape at the center, adjust the position of the mirror so that the laser aligns with the center.
Step 6: Once the mirror is perfectly aligned, move to the next mirror.
Order of Mirror Alignment Process
Now that you know how to check the alignment, you can start calibrating all the mirrors.
However, it is important to understand the path that the laser beam follows to get to the workpiece.
| Order | Description |
|---|---|
| Laser Tube | Fixed in its designated place with minimal scope for adjustment |
| Mirror 1 | Directly in line with the output of the laser tube, and reflects the laser to the Mirror 2 |
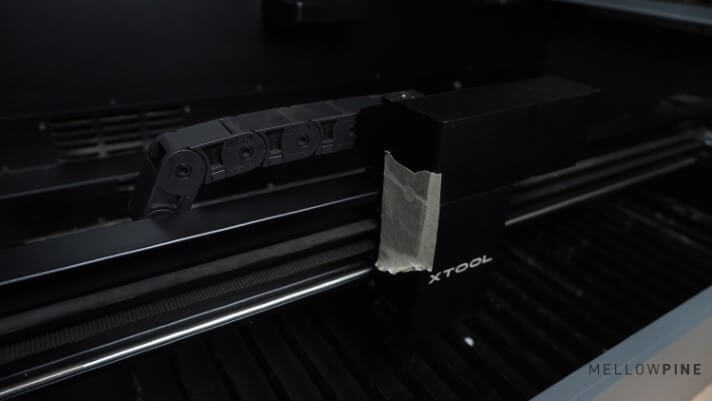
| Mirror 2 | Placed on the X-axis gantry and moves back and forth along with the gantry |
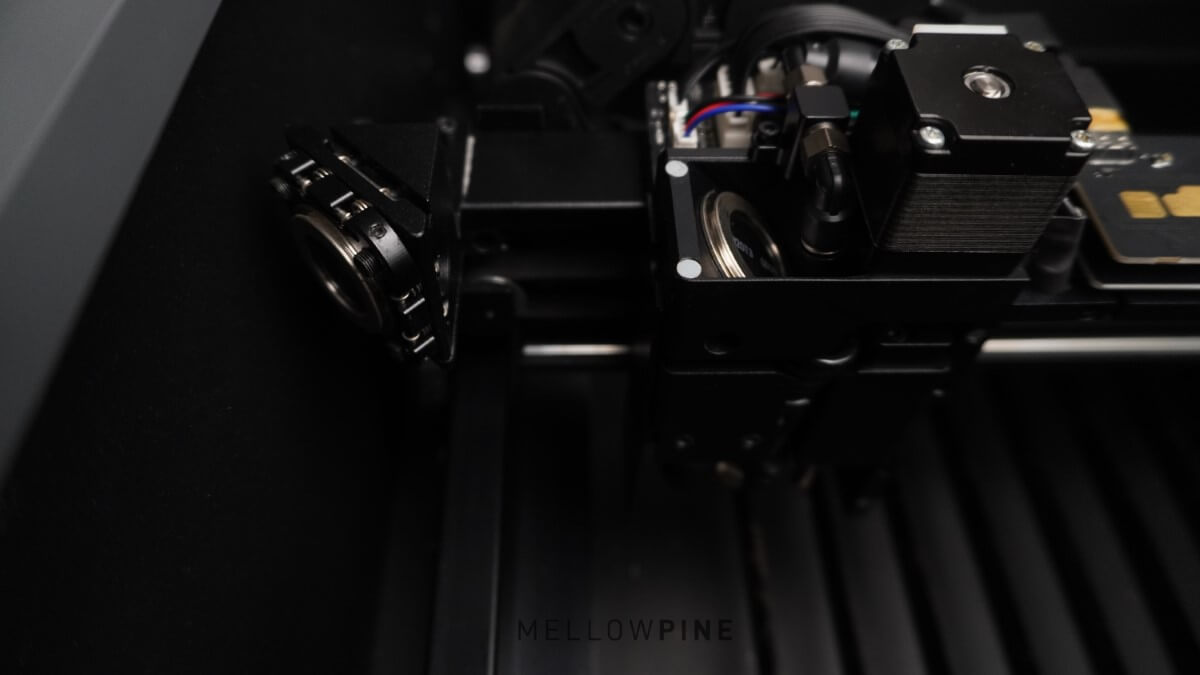
| Mirror 3 | Placed on the laser head. The laser from Mirror 2 is reflected in Mirror 3 |
| Focusing Lens | Placed inside the laser head. The laser from Mirror 3 passes through the focusing lens |
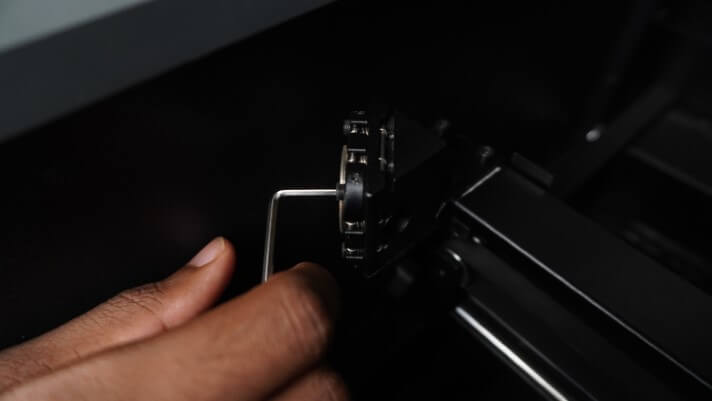
1. Align the Laser on Mirror 1
To align the laser on mirror 1, it is first important to ensure that the laser tube is perfectly leveled and secured firmly in place.
Once the tube is leveled, you can then use the masking tape method to check the laser alignment on Mirror 1.
If the laser is not perfectly centered, adjust the laser tube to position the laser as close to the center as possible.
2. Align the Laser on Mirror 2
Once you finish aligning mirror one, it is not time to align the laser on mirror 3 using the masking tape method.
To do this, move the X-axis gantry to the extreme front and fire the laser to check the position of the laser mark.
If the mark is perfectly centered, move the X-axis gantry to the extreme back and fire the laser again.
Now check that the marks produced at the extreme front position coincide with the marks produced at the extreme back position and are perfectly centered.
If any of the two makes are not centered, you can adjust the mirror 2 using the positioning mechanism provided by the manufacturer.
Generally, each mirror has three positioning screws. One is for adjusting the front and back tilt, one is for adjusting the left and right tilt, and one is for adjusting the diagonal tilt.
Using these screws, make sure the laser is perfectly aligned on the mirror 2.
3. Align the Laser on Mirror 3
After aligning the laser with mirror 2, it is now time to align the laser with mirror 3, which is present on the laser head.
Since mirror 3 moves along with the laser head, it is important to check the alignment at all four corners of the work area.
To do this, move the laser head to the first corner and fire the laser. Similarly, move it to all four corners and make sure that the burn marks at each corner coincide with the other.
If the laser does not align properly, use the adjusting screws on mirror 2 to set the proper alignment.
Note: A misaligned laser in one of the corners can cause an issue where the laser cuts normally throughout the work area but fails to make a cut when the laser head traces a design in that particular corner of the work area.
4. Align the laser on the Workpiece
After aligning the laser with all the mirrors, it is now time to make sure that the laser is perfectly aligned with the focusing lens and produces a fine spot on the workpiece.
To do this, place some masking tape at the opening of the laser nozzle and gently press it to make an indent.
Now, fire the laser and analyze the position of the burn mark produced on the tape. Ideally, the burn mark should be perfectly centered with respect to the indent of the nozzle opening.
If the laser is not perfectly centered, the laser can hit the inner walls of the nozzle, which can block the laser completely or even produce defects like blurry or double engravings.
To align the laser through the focusing lens, adjust the position of mirror 3 until the laser is perfectly centered.
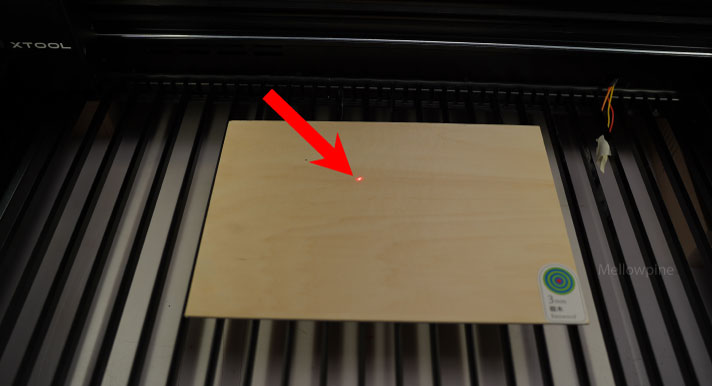
If your laser comes with a red-dot pointer, you can use the red dot as a reference to align the laser on the workpiece surface.