


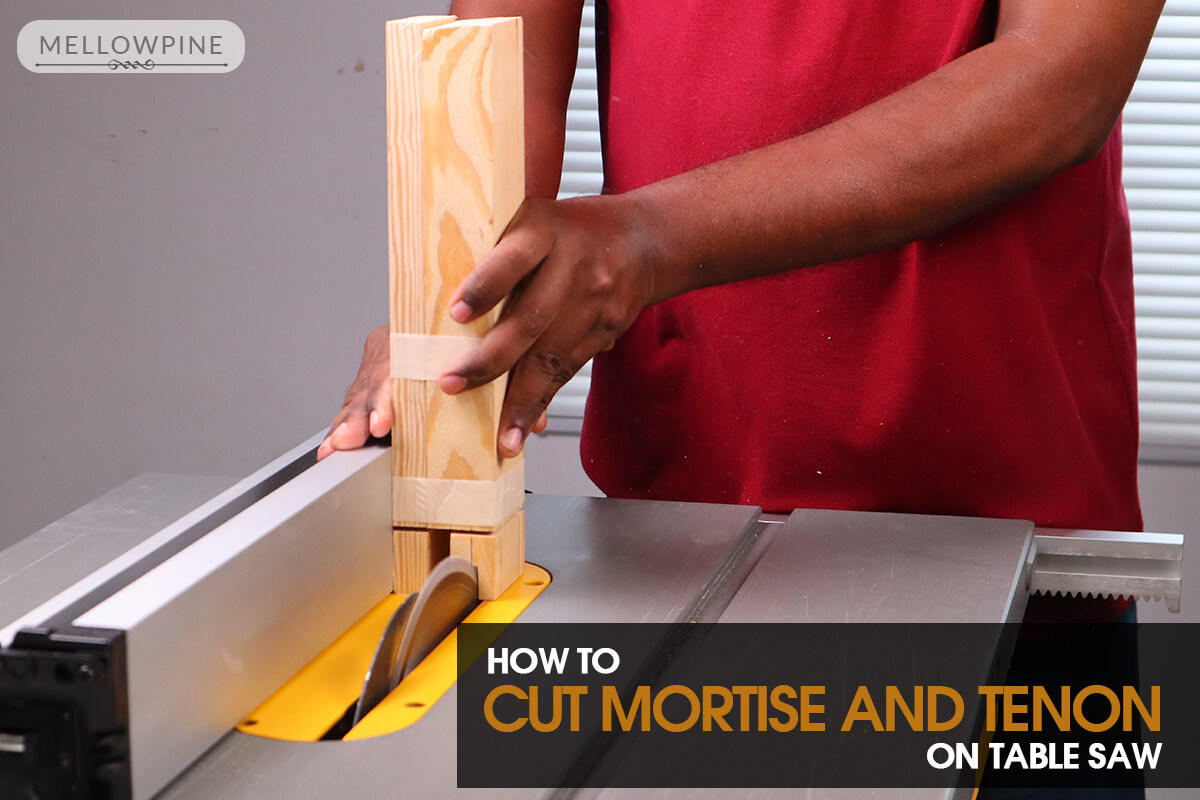
A mortise and tenon is one of the strongest joints in woodworking and it can be made using a table saw.
As the name suggests, it’s made up of two parts: A mortise and a tenon.
In this guide, I’ll show you how you can make this joint using a table saw.
Things You’ll Need
- Table Saw
- Wood
- Mallet
- Chisel
- Bench Vise
- Pencil
- Measuring Tape
- Drill
Cutting Mortise and Tenon on Table Saw [Step-by-Step]
The dimensions of the mortise and the tenon can vary depending on your need.
In this guide, I’ll make a mortise and tenon joint to connect two pieces of wood with 1.5″ thickness and 2.5″ width.
Begin by placing the wood to be joined onto the table. You need two of these for a joint.
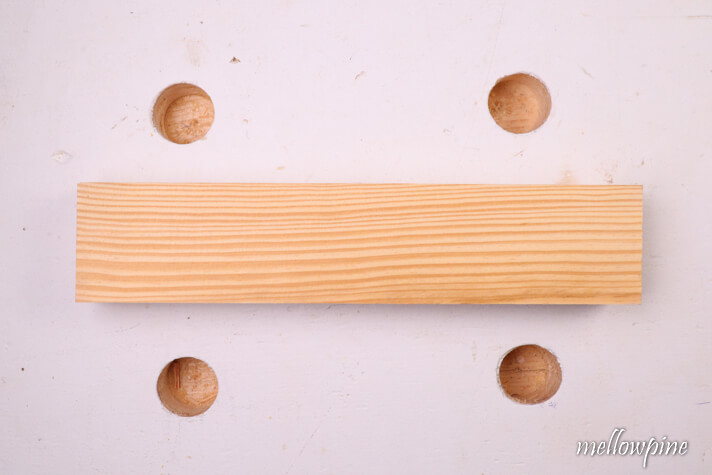
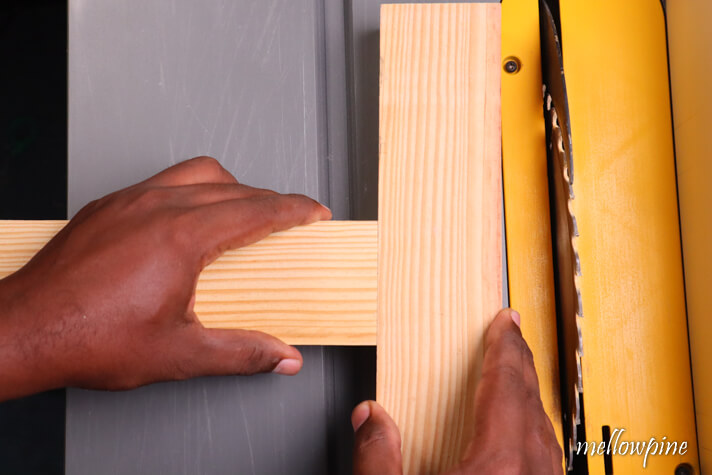
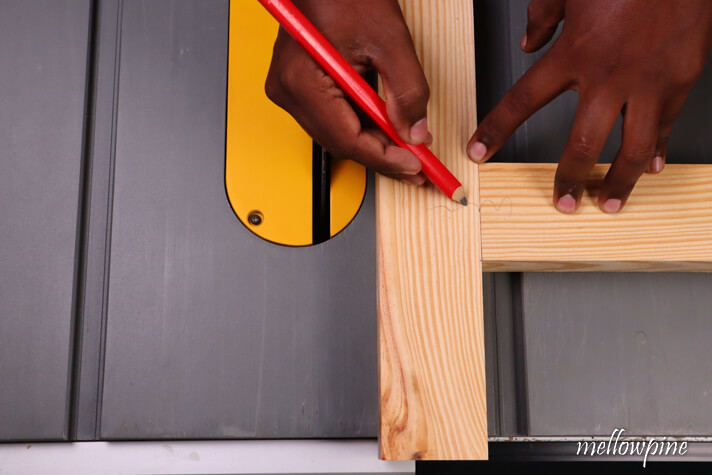
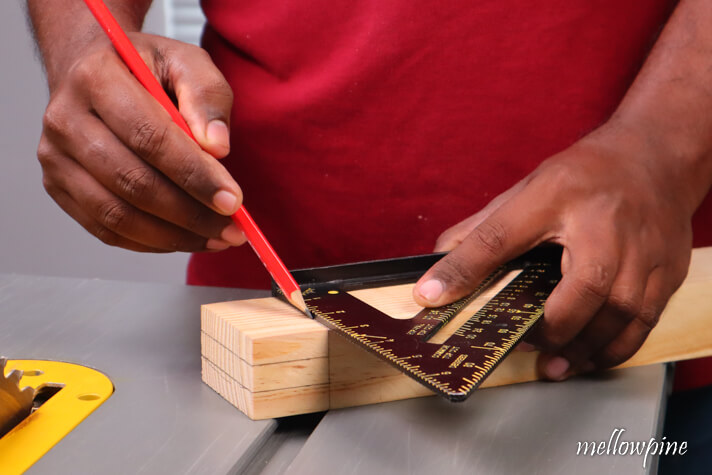
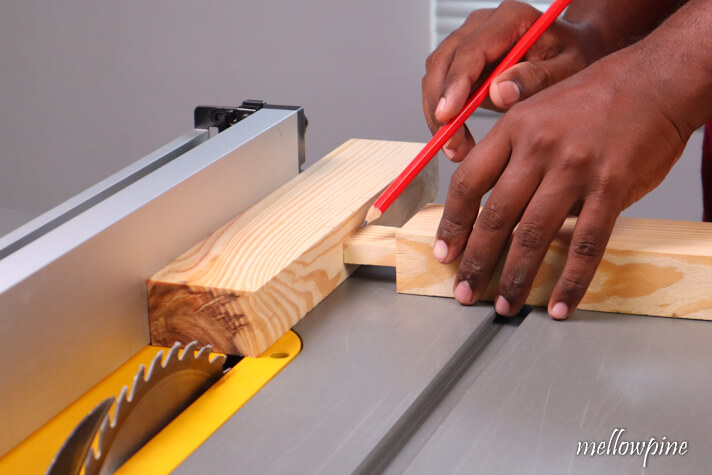
With both wood now on the table, take the wood to be tenoned and line it perpendicularly with the wood to be mortised at the exact spot where you want the joint to be made.
Mark the top face of both pieces with a pencil for referring later.
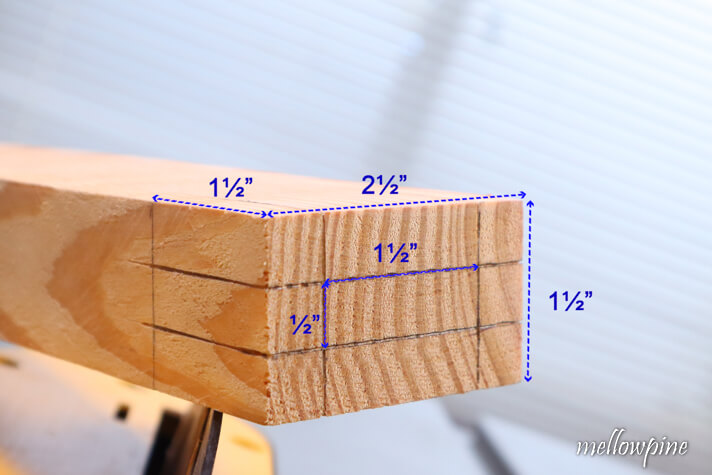
There is no fixed size you need to use for the tenon except that the mortise depth is kept at around 3 times the width of the tenon.
In this case, I’ll choose a tenon width of ½”, so the mortise depth can be 1-½”.
Remember that the mortise depth and tenon depth are the same.
Whichever size you choose, make sure that there is a large surface area for applying glue on the tenon.
Mark the tenon size using the dimensions above.
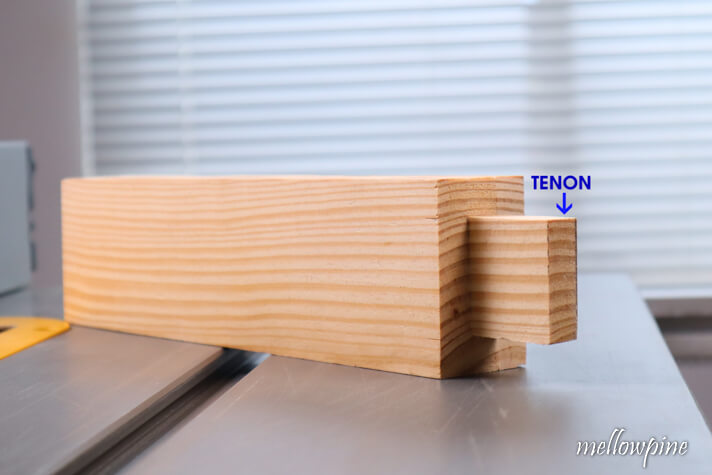
With that, you now have the tenon marked and ready to be cut.
Only the center part will remain, the rest (called shoulder) will but cut off during the tenon-making process.
Set the table saw blade height to 0.5 inches by measuring using a speed square.
Use the miter fence to make the first cut.
Adjust the rip fence such that the cut line of the wood is aligned with the blade.
Make sure to account for the blade thickness.
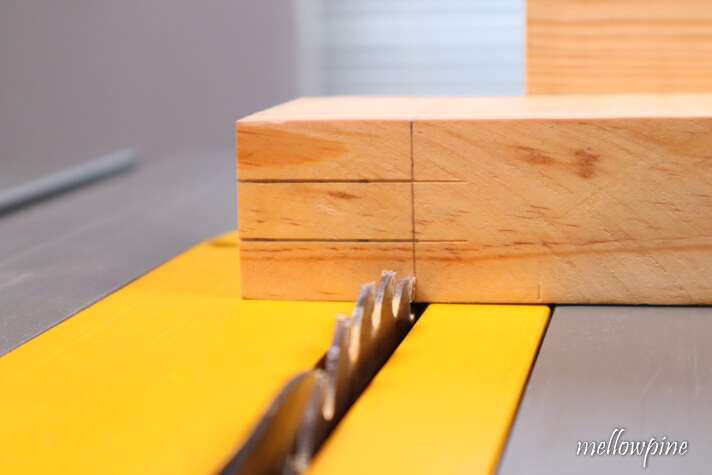
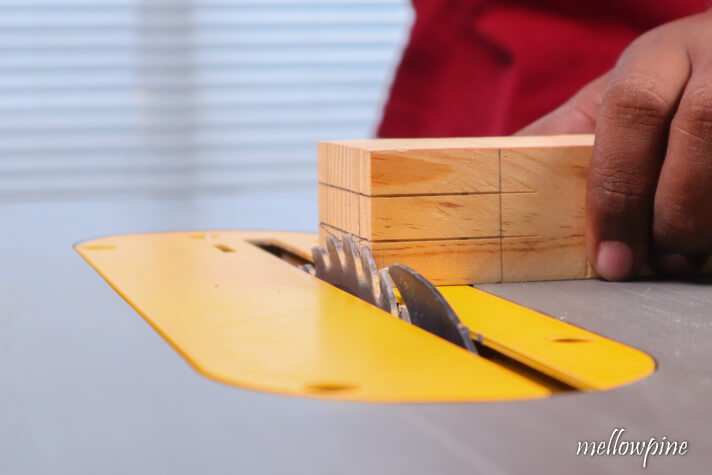
Start the saw and cut along the long shoulder line.
You can use the rip fence here because there is no offcut to cause a kickback.
Flip the wood to be tenoned and cut the other three sides too.
You may need to raise or lower the blade for each cut.
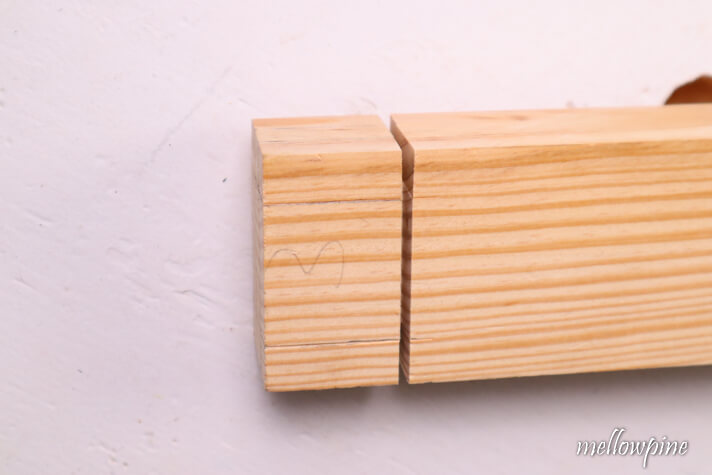
After cutting all four sides, you’ll end up with the wood as in the photo below.
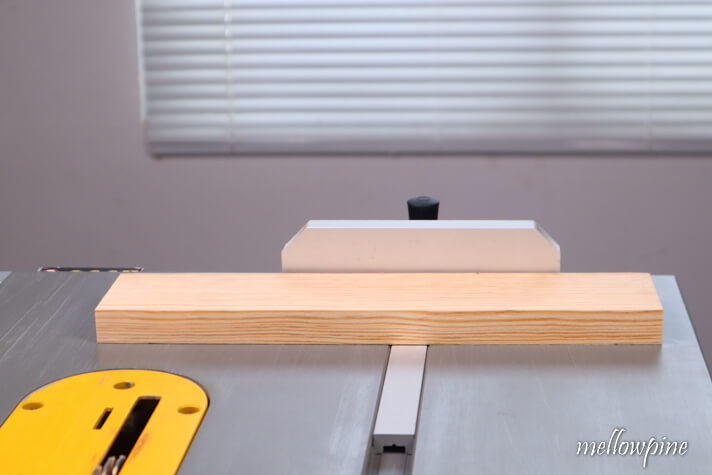
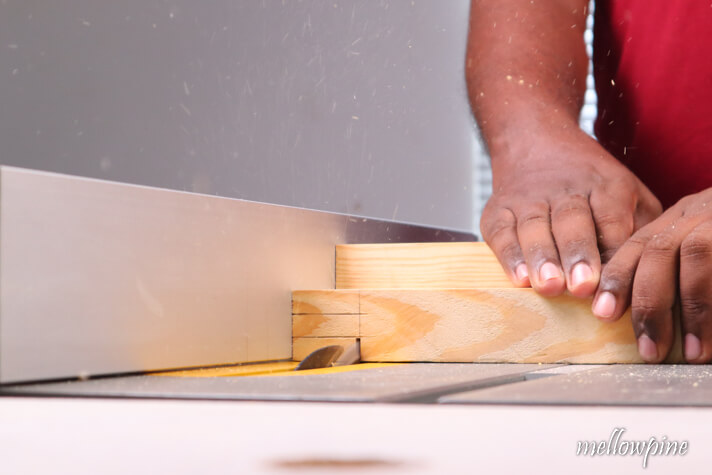
For the next cut, we’ll keep the piece upright.
Keep the wood upright and raise the blade until the blade height matches the depth of the tenon.

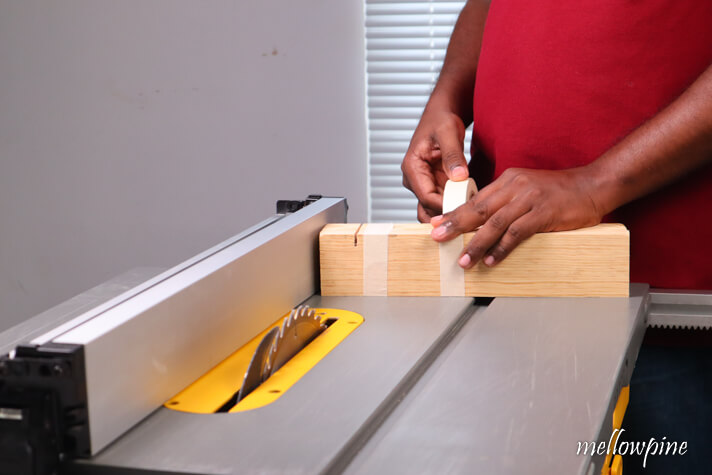
Take a scrap piece of wood and attach it to the wood to be tenoned using screws or masking tape for additional rigidity while cutting it upright.
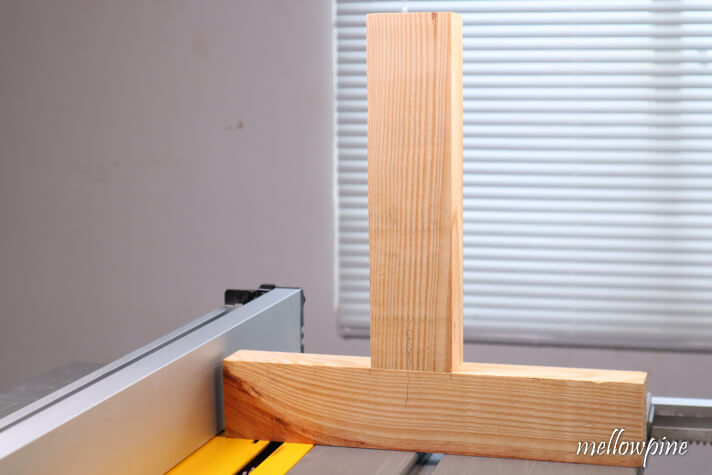
Hold the wood vertically and make repeated cuts on the table saw.
You’ll need to adjust the rip fence multiple times to get the entire shoulder part cut out.
After multiple cuts, you’ll have a tenon like in the photo below.
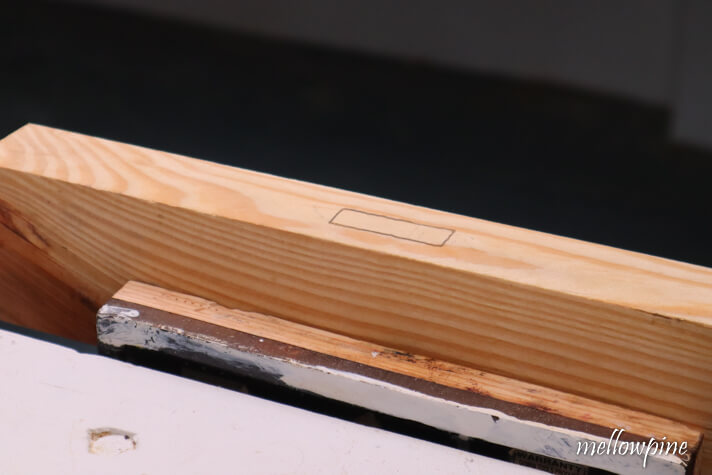
Next, place the tenon perpendicular to the wood to be mortised and trace the dimensions of the tenon onto the wood.
Fix the wood to be mortised onto a bench vise.
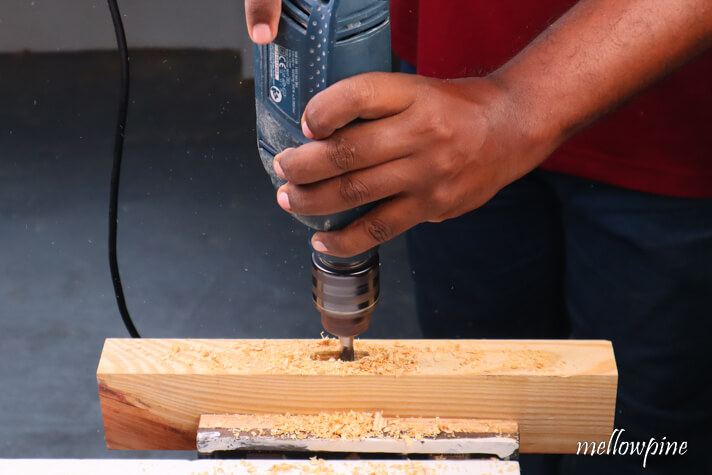
Using a drill, drill holes into the mortise wood within the marked boundary of the mortise.
The depth of the mortise should be exactly the same as the depth of the tenon.
Use a drill stop to get the depth correct while drilling.
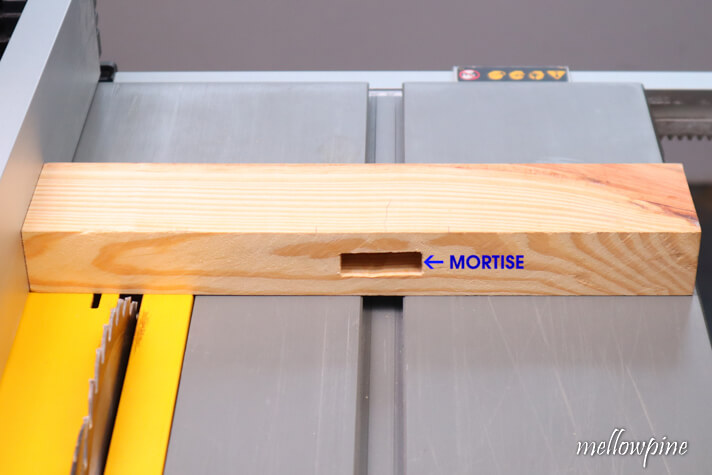
Once the holes are drilled, clear away the rest of the wood using a hammer and chisel.
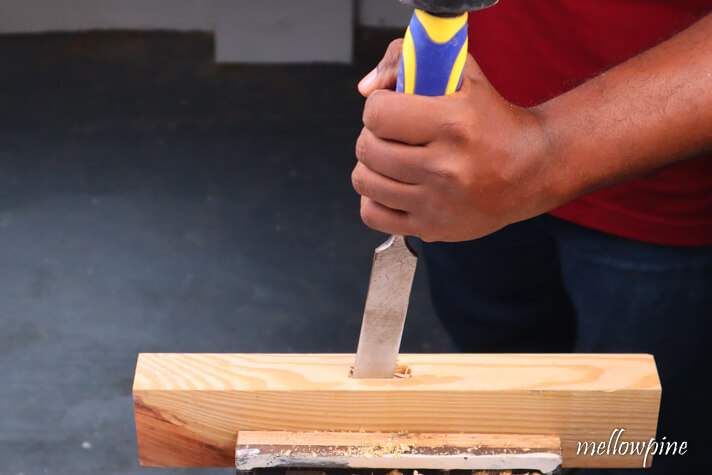
This should yield you a clean mortise.
If you don’t want to use a chisel and hammer, use a plunge router instead.
The easiest way to make a mortise in wood is using a drill press with a mortising bit.
Insert the tenon into the mortise and use a mallet to push it all the way through.
Ideally, the tenon should fit tightly into the mortise.
If it does, apply glue on the surface of the tenon and join them together.
If the size of the tenon is too big for the mortise, use sandpaper to sand away the excess width.
Lastly, if the tenon fits in loosely in the mortise, you’ll need to use another piece of wood and repeat the process to get a snug fit.
Know that a mortise and tenon is a joint used by professional woodworkers and you might need a few trials before you can get it right if you are a beginner.
Tips for Accuracy While Cutting Mortise and Tenon on Table Saw
- While selecting the width of the mortise, remember to check if the chisel you have is smaller than the width or else it won’t fit in the slot.
- Use a sharp blade with an appropriate number of teeth. More teeth on the saw blade means better cut but takes longer to cut and large teeth means quick but rough cuts.
- Make sure to cut outside of the line, so the wood piece that you intend to use has the correct dimensions.
- Miter fence of the table saw can help create perfectly square cuts as its parallel to the blade as well as perpendicular. This is a much better alternative than using hands to push the wood.
Tips for Safety While Cutting Mortise and Tenon on Table Saw
- Make sure the wood is tightly secured inside the bench vise and always be cautious while using a chisel and a mallet as the chance of injury is high if you happen to miss/slip.
- Never stay right behind or too close to the running blade to avoid injury in case of kickback. Kickback is extremely dangerous and must be prevented at all costs.
- Never lift the saw blade above the material being cut by more than 1/4th inches.