


A table saw is one of the most effective and accurate tools you can have in your workshop for a rip cut. But can you really rip 2x 4 on a table saw?
How to rip a 2×4 on a table saw?
You can rip 2 x 4 on a table saw effectively provided you set the rip fence correctly, use proper technique and use the right tools. The proper technique while ripping a 2×4 is to apply pressure in three directions, that is, against the rip fence, forward (for pushing the wood), and downwards for keeping the wood flat. The right tools for ripping a 2x 4 include having a push block, earmuffs, and an accurate ruler for setting the rip width.
MellowPine is reader-supported. When you buy through links on my site, I may earn an affiliate commission at no extra cost to you.
Video Guide- Ripping a 2×4 with a Table Saw

Subscribe to Mellowpine_DIY on YouTube for getting our latest DIY videos in your YT feed- Subscribe to Mellowpine YouTube Channel.
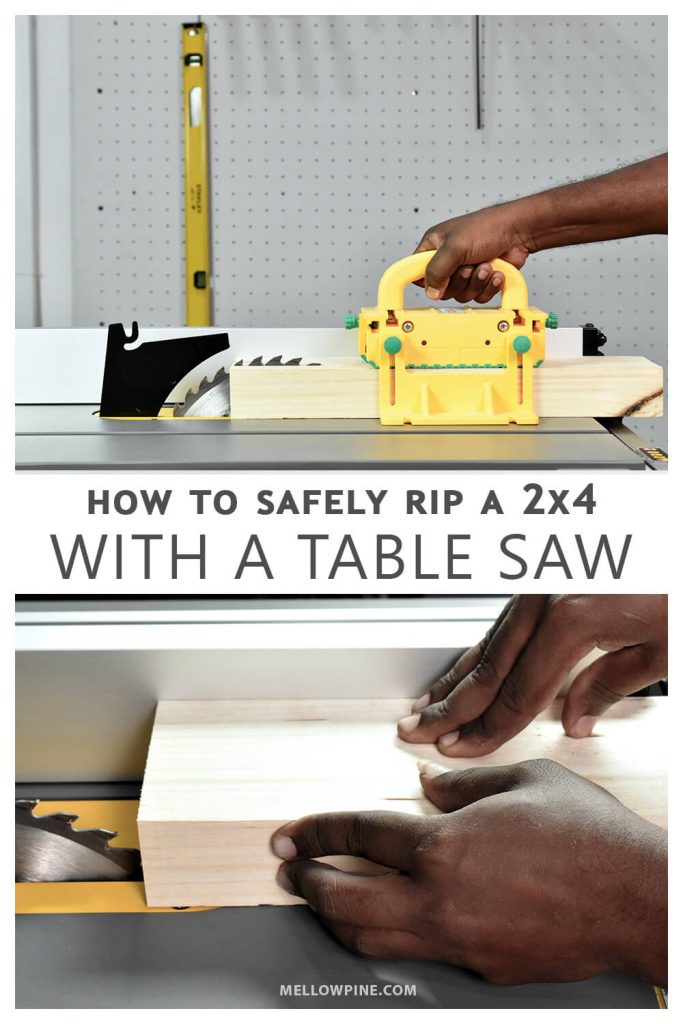
How to Safely Rip a 2×4 with a Table Saw
There are a few parts to safely ripping a 2×4 with a table saw. These are:
- Setting up the table saw
- Preparing yourself
- Making the rip cut
Setting up the Table saw:
The first step is setting up your table saw. Now, Before doing any adjustments on the table saw, make sure that the saw is unplugged.
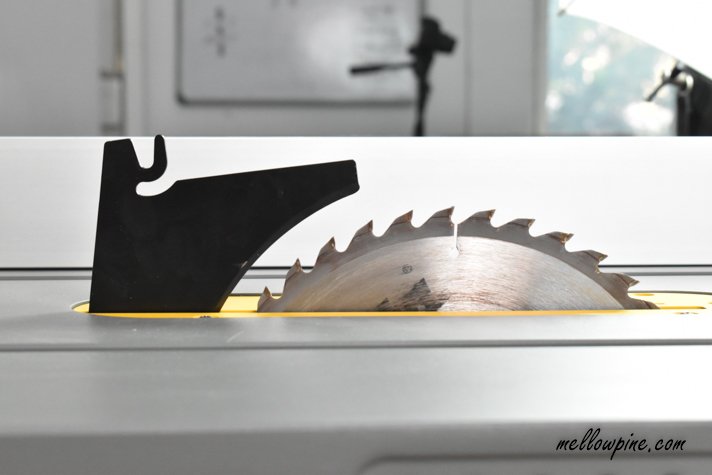
After unplugging the table saw, fix the table saw blade on the arbor of the saw using the nut (picture) and the arbor wrench. When you tighten the nut, just ensure that it is snug. There’s no need to tighten the nut too much.
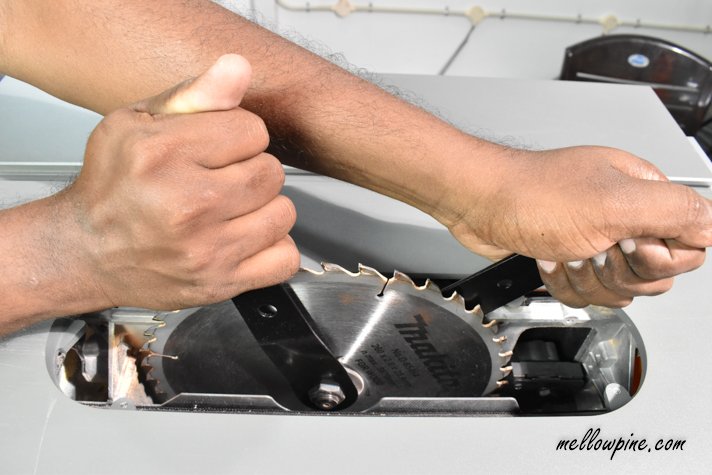
Point to note is the direction of the table saw blade. Make sure the teeth of the table saw blade is facing you.
If the table saw blade is fixed in the wrong direction, the blade will take the wood and shoot it into the air when used.

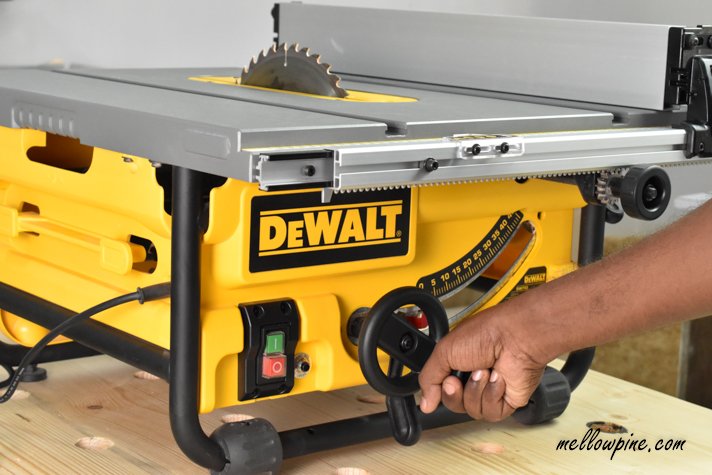
Setting the height and angle of the blade- Almost all saws have the option to adjust the height and angle of the cut.
This is done by adjusting the wheel or the crank, depending on your model of table saw.
If you didn’t know, the height of a table saw is made adjustable for making cuts of different heights.
Commonly table saws come in two sizes, 10 inches and 12 inches. The 10-inch saw is the most common and the 12-inch saw is used industrially.
The deepest cut possible with a 10-inch saw is usually just 3 inches.
The blade can be tilted as well, for making beveled cuts.
The maximum angle that a table saw can bevel up to is 45 degrees and really if you think about it, that’s all you ever need.
But most often, actually 99% of the time, you just want a 90-degree cut.
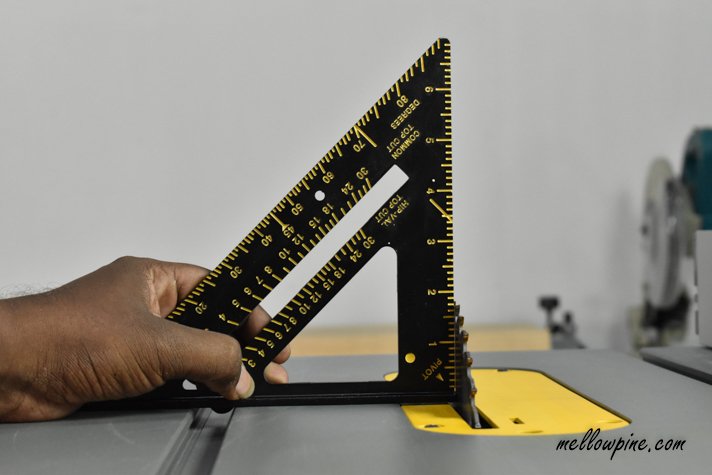
Check the blade tilting adjustment and make sure the angle is set to 90 degrees or zero degrees.
Some table saw models have accuracy issues in the bevel adjustment and you might get a beveled cut even when the blade is set to 90 degrees.
The best way to check the 90-degree angle or make adjustments in case there are inaccuracies is to use a woodworking square.
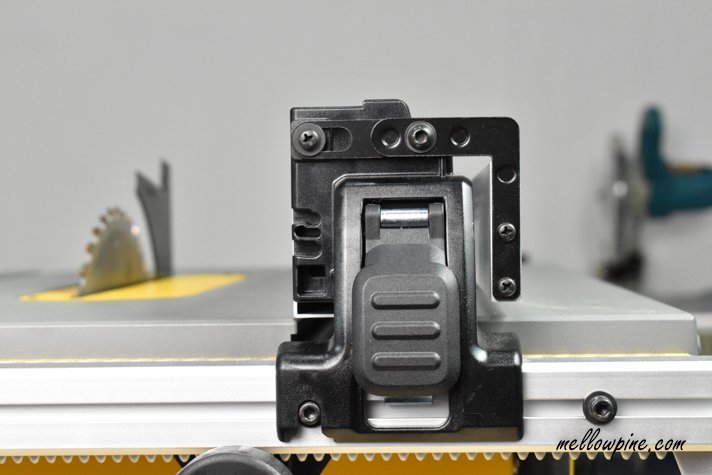
Ensure Riving knife is in place: A riving knife could be the second most important safety instrument in your table saw (the first would be using a proper push block jig to protect your hands).
Never use a table saw without the riving knife properly in place.
Checking the alignment of the riving knife: Now a riving knife is supposed to perfectly align with table saw blade.
Sometimes in a new table saw, the knife may not align perfectly with the table saw.
Make sure Blade guard is in place: A blade guard prevents your hand from accidentally touching the blade.
Now, some woodworkers choose to remove the blade guard, usually because it sometimes obstructs the view while making a cut.
Nevertheless, it is important to keep the blade guard on the table saw, especially if you are new to woodworking.
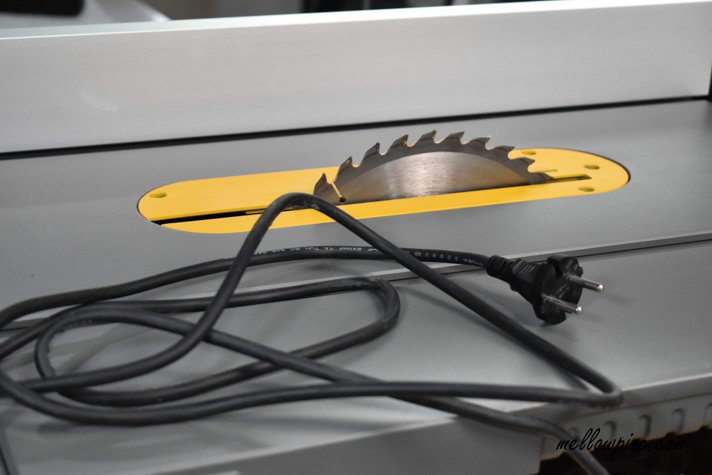
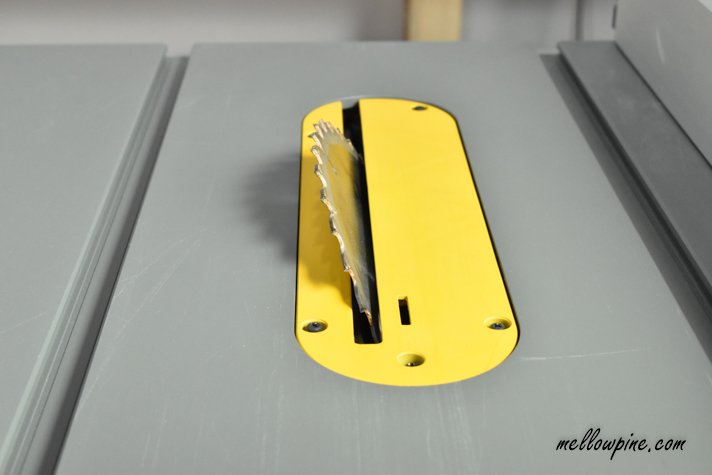
Insert plate: the insert plate helps prevent small wood pieces from falling into the gap between the table saw top and the blade.

The next step is to ensure that the insert plate is level with the table saw top.
If the insert plate is not level with the table saw, the wood piece will not cut smoothly and will get pushed upwhen going over the insert plate get pushed down if the insert plate is below the level of the tabletop.
Parallel Rip Fence: The rip fence of a table saw must be perfectly parallel to the blade. The most common cause of a kickback is the rip fence not being parallel to the blade. This is most important for using any table saw ripping operation.
Prepare Yourself
- Do not operate table saw while being tired or inebriated.
- Stand only on the side of the table saw, never directly behind the blade. Mostly kickback flies in the line of the blade and standing directly behind puts you at risk.
- Make sure there are no wires running in the shop that could trip you up while using the saw.
- Ensure there is enough space for free movement of the wood piece and your hand. Never operate table saw in a congested space.
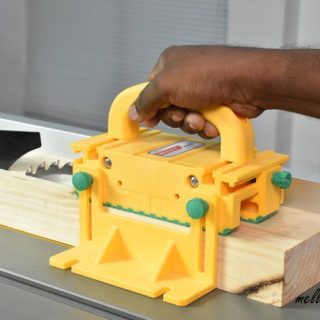
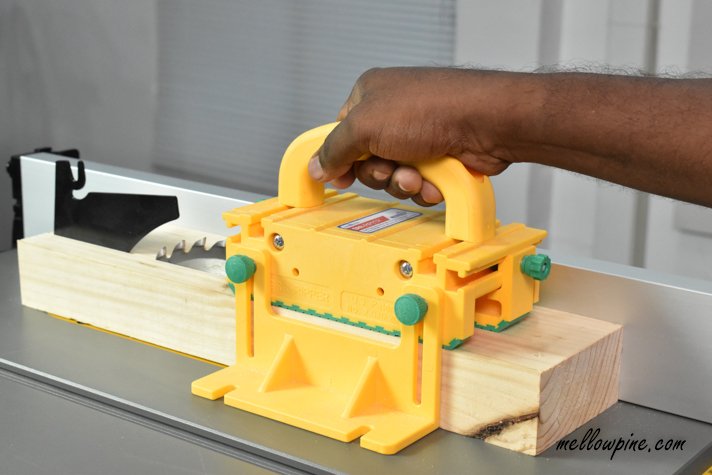
The most important tip that I can give you is to use a pushblock like Gripper while making a cut using a table saw. Table saw accidents are no joke and could result in loss of limbs.
Over 30,000 accidents happen every year in the United States from table saws [Source]. Almost 99% of them could have probably been avoided by using a push block.
A push block costs just over $75, but it could save your finger from being cut off. Never use a table saw without it.
- Protect hands and prevent kickback like never before
- Powerful high-friction durable grip for extreme hold
Ripping the 2×4
After table saw is set up with all the safety steps, you are ready to rip the 2×4.
Setup the rip fence: Measure the required width of the rip cut using the rip fence ruler in the table saw.
As a demonstration let’s see how to get a 2 x 3 inch wide piece from the 2 x 4.
Using the ruler on table saw or using a tape, measure 2 inches from the inside of the blade to the rip fence.
Actually, the inbuilt rulers in many table saws are not very accurate, making the tape a safer bet.
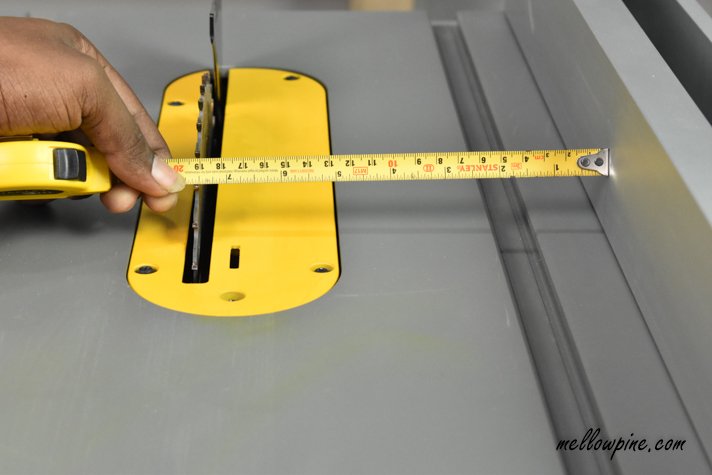
Note that if the measurement is made from the outside of the blade, the required piece would be a bit narrower than 2 inches.
This is due to the blade width or the kerf of the blade, which takes up a bit of width.
Adjust the rip fence and lock the rip fence in place
What is a rip cut?
A rip cut is a cut in the wood along the grain and in the longer direction of the wood.
Choosing the side to make the cut: When ripping the 2 x 4, always ensure that the larger piece after the cut is on the side of the rip fence and the shorter piece or the cutoff piece is on the outside of the blade.

Pushing the piece: When pushing the piece, make sure that the 2 x 4 is pressed against the rip fence.
This will ensure uniformly wide cut.
Lower pressure on the fence can cause the cut to be wider than you intend to.
Dry run: Always make a dry run with the saw turned off, after fixing the rip fence in place.
This is to make sure the measurements are in place and that you’re confident of how your hand should move and how you should hold your push block while making the cut.
Any issues with the insert plate or the rip fence not being locked properly could be detected with a test run.
Your position: Stand to the side of the table saw and never directly behind the saw, as that directly puts you in line in case of a kickback.
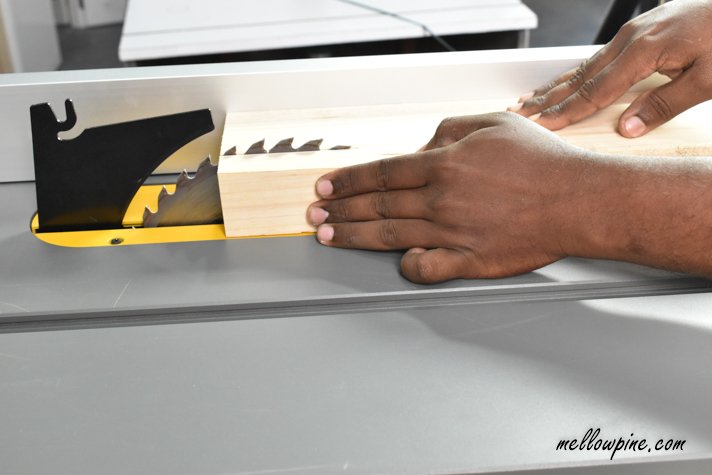
Making the cut: Now, there are two parts to this. The first part is getting the piece into the blade.
This part is to be done using your bare hands. The second part is pushing the wood through the blade and completing the cut.
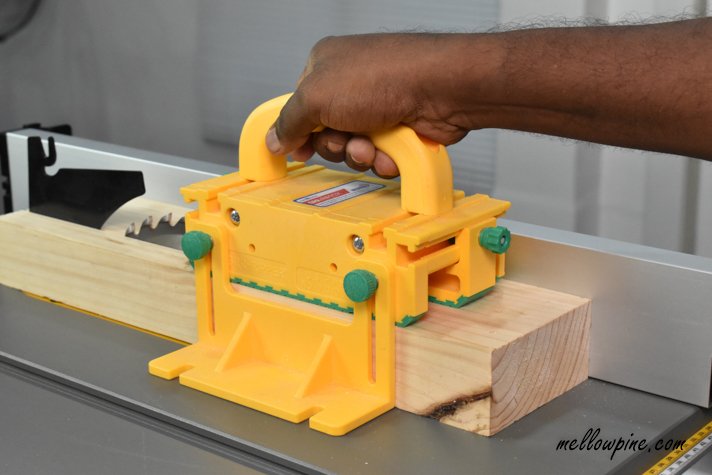
This part should be done using a push stick or a push block.
A push block would be the best option as it would give the best control making it the safest option.
In the first part, while pushing the wood in to the blade, use your left hand to push the blade on to the rip fence and the right hand to push the wood forward and also downwards.
Using a Push block: After the 2×4 enters the blade, use a push stick or a push block.
If you’re using a push stick, you’ll need to use 2 push sticks.
One for pressing the piece against the rip fence and another for pushing the wood forward.
If you go with a push block you only need to use one hand to apply pressure in all three directions, i.e. up against the fence, downwards, and also forwards.
The most important step here is to make sure that your hands are not closer than 6 inches from the blade in the first step.
Focus your attention on the rip fence and making sure that the wood piece is pressed against the rip fence.
A beginner’s mistake is to look at the blade instead of the rip fence.
- Protect hands and prevent kickback like never before
- Powerful high-friction durable grip for extreme hold
You might be interested in these:
If you found this post useful, please pin the photo below to your woodworking tips/ideas board.
Take a look at these cool DIY projects you can build on a budget,
A lot of new woodworkers have this question- Can you plane an end-grain cutting board? Read my answer to this question here- Should you plane an end-grain cutting board?
General safety tips while ripping a 2×4 or any piece using a table saw:
- Use Earmuffs: Always wear earmuffs when using a table saw. The loud sound of a table saw would lower your hearing ability with repeated exposure.
- Lock the door of your workshop or garage: Now this might seem random, but the last thing you want when using a table saw is to get startled by someone barging into your workshop. Be especially careful if you have small kids in the house.
- Avoid movements over a running blade: Never reach over and make adjustments to the rip fence or wood piece while the blade is running. Even if your hand doesn’t touch the blade, even a small piece of wood touching the blade can cause kickback and serious injury.
- Avoid loose clothing or jewelry: Needless to say, getting a piece of your cloth or jewlery entangled with the table saw can result in serious injury.
- Never use a miter fence and the rip fence together while making a cut.
- Make sure the wood piece is free of foreign objects: Any screw, nail or staple can come off while cutting using a table saw. Any contact of these objects with the blade will cause it to come on to you in a projectile causing serious injury.
- Never use a glove while operating a table saw: While this may seem counter intuitive, a glove can do more damage than good. But there are several reasons here, the most important being that you will lose feel of the wood and this is very important while using a table saw. Other reasons for not using a glove include loss of grip strength and risk of glove getting entangled in the blade.
- Ensure that the miter fence is perfectly parallel to the blade: Now, a miter fence that is not perfectly parallel to the blade is a major defect for table saw and could become the cause of major kickbacks and injury.
How to Safely Rip a 2x4 With a Table Saw
Learn the steps for safely ripping a 2x4 with a table saw
Materials
- 2 x 4 Lumber
Tools
- Table Saw
- Push Block
Instructions
Setup the Table Saw Correctly
- Position the table saw correctly and before doing adjustments ensure saw is unplugged.
- Make sure the blade is tightened correctly in the arbor. Not too tight and certainly not loose.
- Ensure teeth of the blade points towards you.
- Set the height of the blade correctly.
- Set the angle of the blade (if bevel is required) correctly.
- Most often you just want a 90 degree cut, so ensure that the blade is square to the table top using a speed square.
- Ensure riving knife is in place and is exactly in line with the table saw blade.
- Make sure insert plate is setup. Without insert plate small pieces will fall into the slot and cause kickback.
Ripping the 2x 4
- Setup the rip fence correctly either using the ruler that comes fixed with the table saw or a tape.
- Adjust the rip fence and lock it in place.
- Ensure the larger/wider piece after cutting is on the side of the rip fence.
- Use your left hand to push sideways towards the rip fence and right hand to push downwards.
- Once the 2x4 has entered the blade, use a push block to push the piece through safely.
Recommended Products
As an Amazon Associate and member of other affiliate programs, I earn from qualifying purchases.
Should you rout an end grain? Learn it here- What you need to know about routing an end grain