


Laser engraving of food is a great way to add custom designs and text to food products.
It has been in use in food industries for quite some time now, but it was only recently it became a part of bakeries and home uses.
You can use a laser to make patterns and designs on food items like cookies, cakes, toast, biscuits, vegetables, fruits, etc.
This guide discusses laser engraving of food by looking at the process, factors, and applications.
MellowPine is reader-supported. When you buy through links on my site, I may earn an affiliate commission at no extra cost to you.
Laser Engraving Food – The Process
Food items can be laser engraved using a diode or CO2 laser. It heats up the surface layer of food material and leaves a dark burn mark on it. Laser engraved foods are safe to consume, but their taste varies depending on the burn intensity.
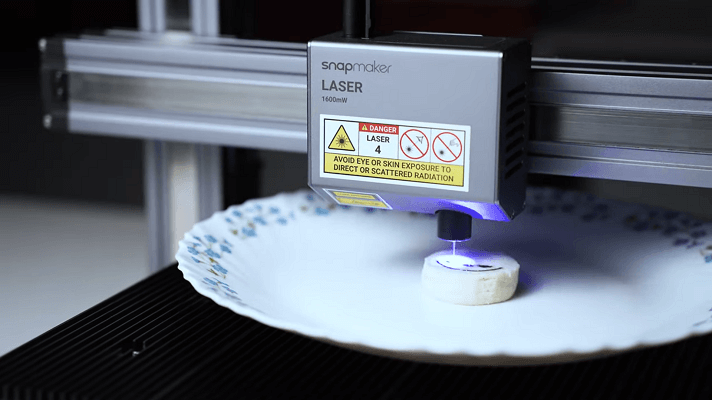
In the following video, I tried engraving some food items.

Selecting an ideal laser system for engraving food
For food engraving applications, UV lasers are the best. These semiconductor lasers (diode lasers) operate between the wavelength of 410–2000 nm.
Portable diode lasers are best suitable for these applications as they can be conveniently placed to mark any type of food item.
However, these lasers have very low-powered laser output, and a comparatively more powerful laser cutter suitable for home applications will be able to complete the job faster.
When laser engraving food items that dry quickly, it is advised to use high laser power at a fast traversing speed to avoid the risk of fire.
You can also use a CO2 laser for food engraving applications. They are much faster than diode lasers but are priced higher.
Testing Parameters
Various food item requires different laser settings as they differ in surface texture, hardness, etc.
So you’ll have to find suitable engraving settings (speed and power) for the specific kind of food you have.
You can test out different settings at once by using a test pattern. These patterns are programmed to try out all possible laser settings at once.

Preparing the Design
You can use any CAD software to make the design files, but ensure to export the file in a format your laser machine reads. It may work with various image formats and program code files.
While preparing the design, use the laser parameter that worked the best on the type of food you plan to engrave.
Running the Job
Before running the job, ensure the surface of the food item to be engraved lies evenly in a plane. If not, the laser beam won’t be able to focus well on its surface.
This will result in engraving with uneven shades. It can also happen when engraving foods that have porous holes in them.
When engraving such foods, you’ll have to use a laser machine with a more extended depth of focus.
Things to Note While Laser Engraving Food
Laser engraving involves various parameters that you need to consider to get the best result.
Therefore, it is important to learn laser engraving basics and safety requirements before getting started with engraving your workpieces.
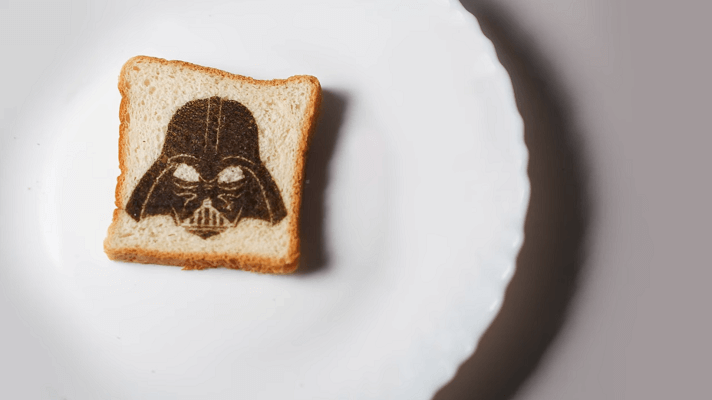
Use simple designs
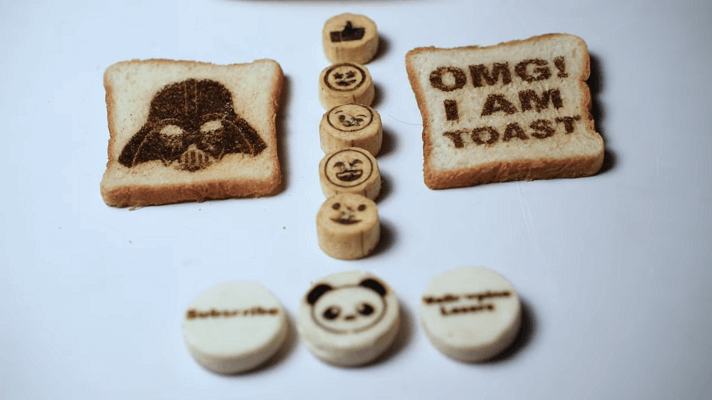
When food is engraved with simple designs, it won’t taste that bad. But when engraved with complex designs having dark shades, it can burn most of the surface, resulting in a bitter taste.
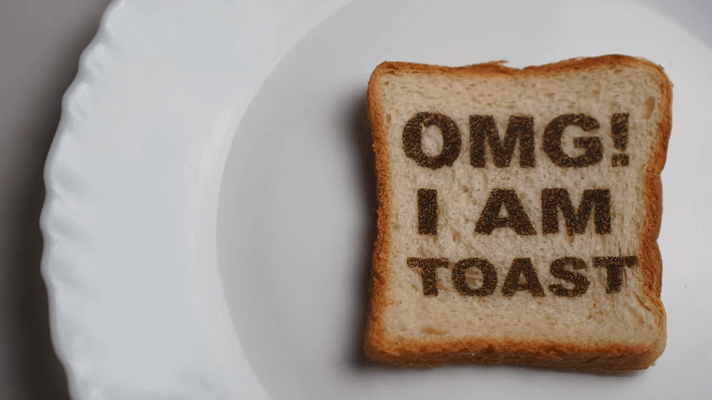
For example, engraving large and contentful designs like the one below on bread can result in bad taste. This also removed a lot of moisture from the food surface.
Also, when using designs with fonts, try to use thick fonts. Thin fonts won’t be clear when engraved on food because of their texture.
When working with food items like fruits and vegetables, you can add complex designs as their surface layer is removed before consumption.
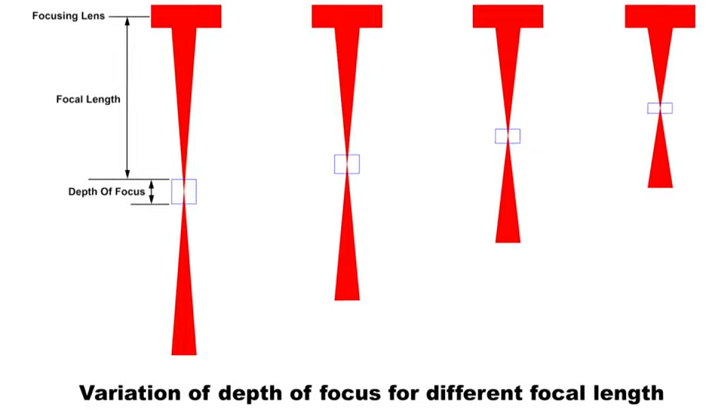
Use proper lens
In general, the lenses used for engraving jobs have a short focal length as it has to focus the laser beam on the workpiece surface.
When working with food items having a varying surface profile, use a longer focal length lens.
It allows the laser beam to stay focused for a greater depth, thereby engraving clean marks.
Use right settings
In laser engraving jobs, finding the proper settings is half the battle. Try to find the right power and speed setting that gives clear engraving.
You can use complex designs with high power to make attractive patterns on food, which won’t taste good but you can use them for making food arts in events and storefronts.
I used the following settings to work on some food items.
| Food | Speed | Power | Line Spacing |
|---|---|---|---|
| Bread | 375 mm/min | 1.5W (100%) | 0.2 mm |
| Cookie | 300 mm/min | 1.5W | 0.2 mm |
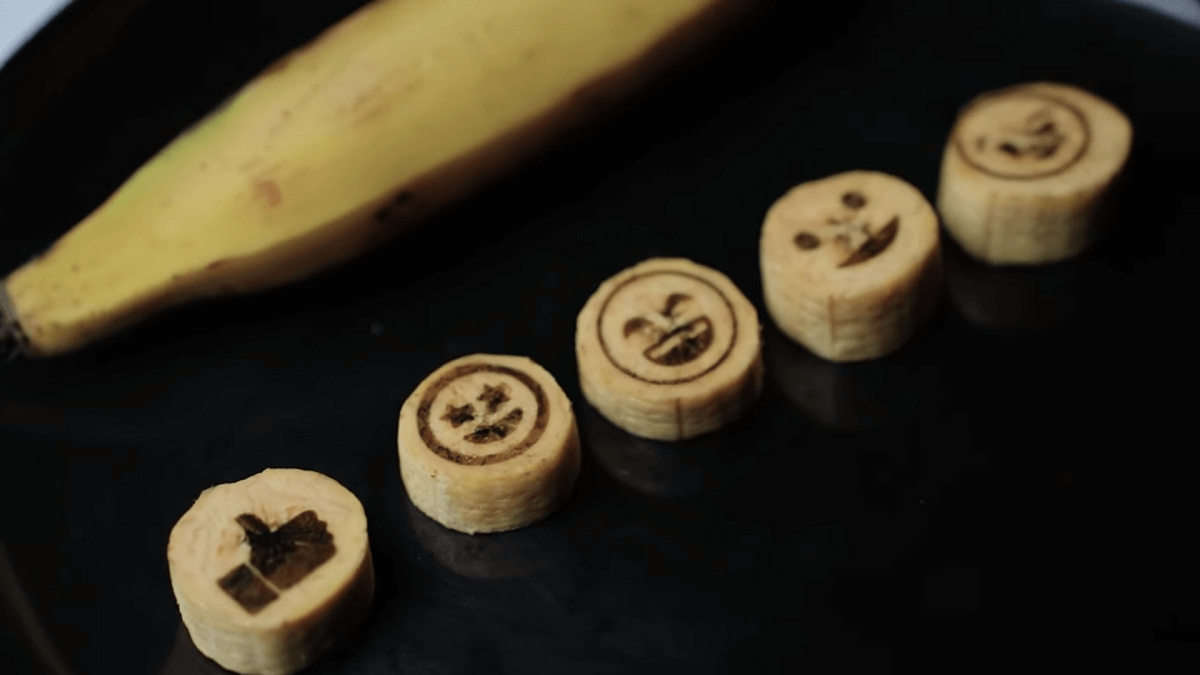
| Banana peel | 425 mm/min | 1.5W | 0.2 mm |
| Banana cut piece | 300 mm/min | 1.5W | 0.2 mm |
One at a time
In an engraving cycle, do not mix food and non-food items. Engrave one at a time.
Else, the leftover particles from the non-food materials can contaminate the food.
It won’t be a problem if you are engraving food just for aesthetic appeal and not to consume.
Applications of Laser Engraved Food
Laser engraved foods are primarily used by bakers to customize their food products. It hasn’t yet become a mainstream technique for marking food products.
But today, many food manufacturing and vegetable/fruit farming companies use laser engravers to mark designs and logos on their food products.
The laser marks by changing the surface color of food products like vegetables and fruits.
Engraved foods are also used in food arts to showcase different artistic ideas.
To further enhance your customizations, you can also use a capable laser to engrave cups and mugs. However, you will need a rotary axis arrangement for engraving curved objects.
Final Thoughts
Laser engraved foods are a new trend in town that has been slowly gaining popularity. It’s a great way to make food look more appetizing.
Today bakers and natural farming businesses use laser engravers to mark their food products.
It is primarily used for branding and aesthetic purposes on cooked and uncooked food items like cookies, cakes, fruits, vegetables, etc.
These machines use laser beams to burn and discolor the surface layer of foods made of organic or synthetic materials.
When the food items are engraved with optimized laser settings, they are safe to consume but will taste different.
You can work on many creative food engraving projects like customized cookies, chocolates, crackers, thanksgiving pies, etc.
Another creative way to customize food items is to laser engrave food packing materials like aluminum foil, plastic containers/covers, etc.
Go through the following guides to learn how to cut and engrave different materials.
Frequently asked questions
What can you engrave with a laser engraver?
With a laser engraver, you can engrave various materials like coated metals, fabrics, rubber, wood, leather, plastic, paper, acrylic, foods, etc. Each material required different laser settings to get a clear engraving.
Can you laser engrave a rock?
Yes, you can laser engrave stones with a laser cutter or engraver. Some of the common stones engraved with laser machines are granite, marble, sandstone, limestone, basalt, pebbles, slate, etc. CO2 lasers having a power of 60W and above are best suited for laser engraving stones.
Is laser engraving hard to do?
No, laser engraving is not that hard to do, but it takes time and effort to master these machines. The most common mistake many make with laser engravers is using the wrong settings. As you work with different machines, you’ll start picking up the correct settings, and slowly the quality of your engraving will improve.