


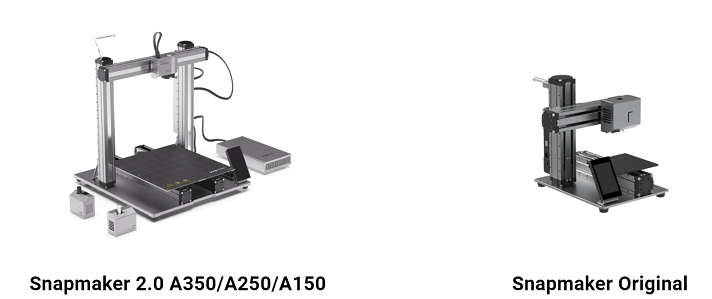
Snapmaker 2.0 is the updated version of the Snapmaker Original.
This is a 3-in-1 machine capable of performing 3D printing, laser engraving, and CNC carving operations.
The main difference between Snapmaker 2.0 and Original is that 2.0 has a larger build volume, which means you can print bigger objects.
In 2.0, the printing speed has also improved, and its software has been updated to make printing easier.
This article reviews Snapmaker 2.0 by putting it to the test and seeing how good it is in each of its 3 use cases.
MellowPine is reader-supported. When you buy through links on my site, I may earn an affiliate commission at no extra cost to you.
Snapmaker 2.0 Review
Snapmaker 2.0 Review Video

Subscribe to Mellowpine Lasers on YouTube for Laser tutorials and expert information- “Subscribe to Mellowpine Lasers YouTube Channel“.
Size
| Size | A150 | A250 | A350 |
|---|---|---|---|
| Footprint (W × D × H) | 11.81″ x 12.44″ x 15.35″ (300 × 316 × 390 mm) | 15.94″ x 16.69″ x 19.29″ (405 × 424 × 490 mm) | 19.48″ x 19.92″ x 22.83″ (495 × 506 × 580 mm) |
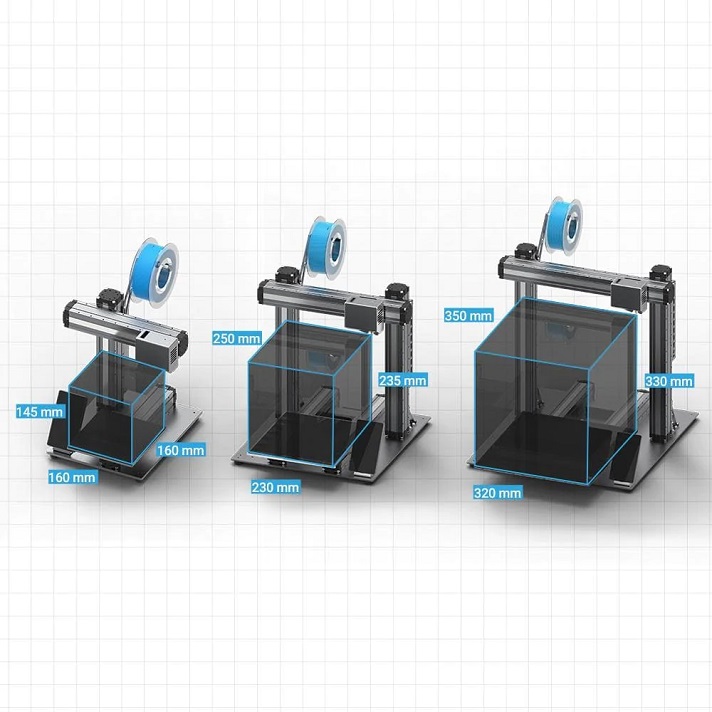
Footprint comparison of A150, A250, and A350 versions of Snapmaker 2.0
Snapmaker 2.0 is available in three different sizes A150, A250, and A350. Each of them has a varying footprint and work area.
The 350 model has the largest build volume and lets you make things that are around 12.5″ x 13.75″ x 13″.
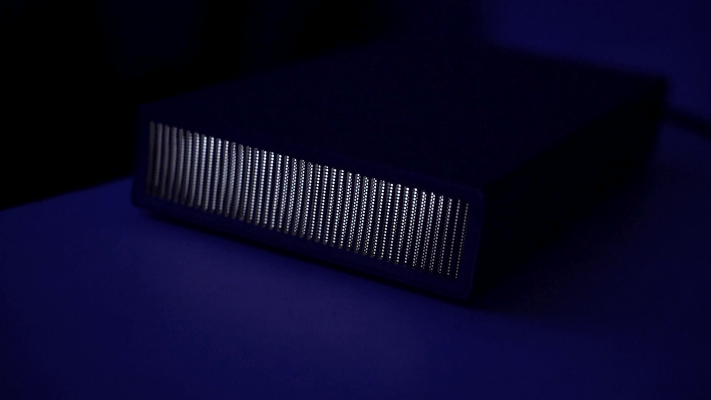
The first thing you will notice about Snapmaker 2.0 is its sleek design and minimalistic look.
Its frames and parts are made of anodized aluminum and have an all-metal build.
All the linear motion components, including the stepper motors and the driver, are housed within sturdy linear modules.
The rigidity of a laser or 3D printing machine does not need to be very high.
But, for a CNC, you need good rigidity to handle all the vibrations and stress when the tool is pressed against the material, and the Snapmaker 2.0 can handle those well.
Its modular design makes it easier to use and switch between different modules for 3D printing, laser engraving, and CNC carving operations.
It can be a bit troublesome if you want to switch between the modules frequently.
When you switch the tool head, you also need to swap the workbed, which can take a bit of time. It takes about 15 minutes to swap the tool head and the workbed.
3D Printing
| A150 | A250 | A350 | |
|---|---|---|---|
| 3D Printing Work area (W × D × H) | 6.29″ x 6.29″ x 5.7″ (160 × 160 × 145 mm) | 9.05″ x 9.84″ x 9.25″ (230 × 250 × 235 mm) | 12.59″ x 13.77″ x 12.99″ (320 × 350 × 330 mm) |
| Layer Resolution | 50 – 300 microns | 50 – 300 microns | 50 – 300 microns |
| Heated Bed Temperature | Up to 110°C | Up to 100°C | Up to 80°C |
| Nozzle Temperature | Up to 275°C | Up to 275°C | Up to 275°C |
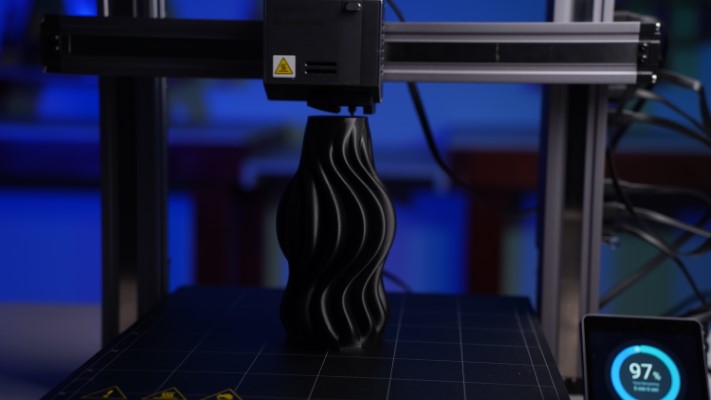
3D printing setup of Snapmaker 2.0 models
The Snapmaker is primarily built as a 3D printer with laser and CNC capabilities, making it a perfect answer to the question “Is a 3D printer a CNC machine?“.
The 3D printing module used on Snapmaker 2.0 has a layering resolution range of 50 – 300 microns (0.05 – 0.3 mm).
Layer resolution in 3D printers is nothing but the thickness of print layers. A resolution of 0.1 to 0.3 mm is the standard in 3D printing.
The print quality is good, but it’s a slow machine, and you will need to be patient with it.
As the machine size differs for each model of Snapmaker 2.0, their work area is also different, and it also changes with the module you are using.
For example, with a 3D printing module attached to the A150, you’ll get a work area of 6.3″ x 6.3″ x 5.7″, but when you attach a CNC module to the same machine, the work area will be 6.3″ x 6.3″ x 3.9″.

Snapmaker 2.0 comes with a heated bed for 3D printing and has a maximum temperature of 80°C.
A heated bed is a type of hot metal plate used in 3D printers that provides a heated surface for the 3D printer to print on.
The main purpose of the heated bed is to keep the part being printed from quickly cooling down, which can lead to drooping or warping.
A flexible print bed is provided with the machine for faster removal of parts from the bed. It goes on top of the heated bed.
On Snapmaker 2.0, you can 3D print parts made of Wood Filled PLA, regular PLA, ABS, TPU, etc.
It has a direct drive extruder nozzle with a temperature threshold of 275°C, which is well above the standard range of 210°C – 250°C.
The nozzle end is hit by a two-way air jet which helps cool the printed part. The 3D module also has a bed-level sensor built into it.
You also get the auto-leveling feature that helps save a lot of time spent leveling the bed manually.
Laser Engraving and Cutting
| A150 | A250 | A350 | |
|---|---|---|---|
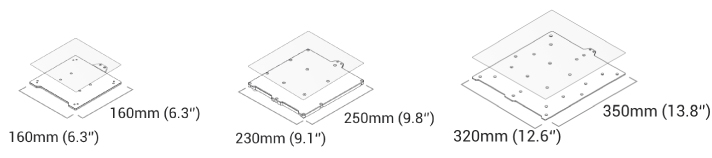
| Laser Engraving work area (W × D × H) | 6.29″ x 6.29″ x 5.7″ (160 × 160 × 145 mm) | 9.05″ x 9.84″ x 9.25″ (230 × 250 × 235 mm) | 12.59″ x 13.77″ x 10.82″ (320 × 350 × 275 mm) |
Laser Engraving work area comparison of Snapmaker 2.0 models
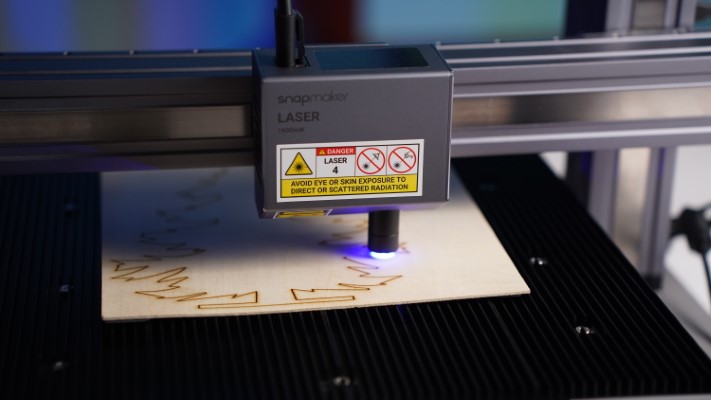
Snapmaker 2.0 uses a 1.6W (1600mW) laser on its laser module. It is a class4 diode laser that operates at a wavelength of 450 nm.
With a laser power of 1.6W, you can work on wood, leather, plastic, fabric, paper, non-transparent acrylic, etc.
It can engrave but can’t cut most of the material. If it’s paper-thin, then you may be able to cut it.
If you want to cut and engrave material much faster, Snapmaker has a 10W laser module available.
The 1.6W laser module has a camera facing the work area. You can use the camera to capture an image of the workpiece and use the Luban software to design directly on the workpiece.
This gives you an idea of how your final product would look.
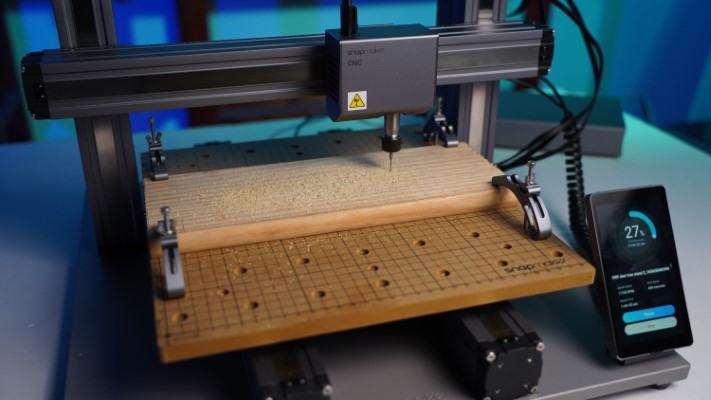
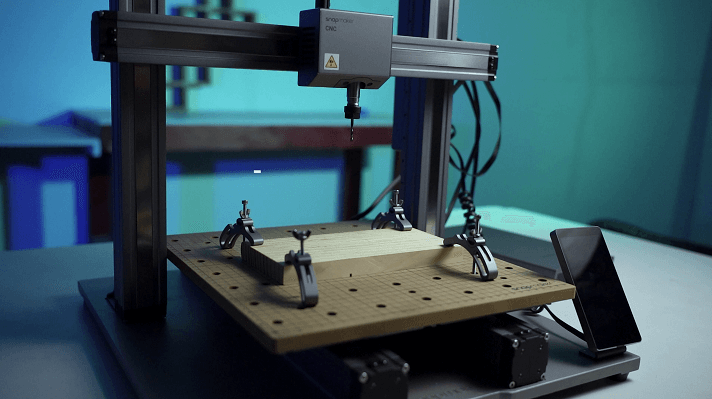
CNC Carving
| A150 | A250 | A350 | |
|---|---|---|---|
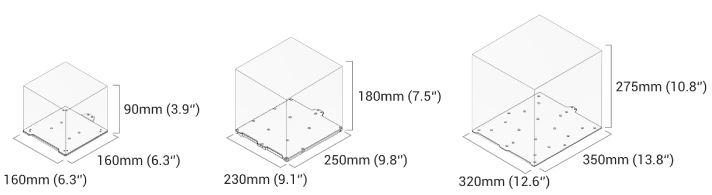
| CNC Carving (W × D × H) | 6.29″ x 6.29″ x 3.54″ (160 × 160 × 90 mm) | 9.05″ x 9.84″ x 9.25″ (230 × 250 × 235 mm) | 12.59″ x 13.77″ x 10.82″ (320 × 350 × 275 mm) |
CNC carving work area comparison of Snapmaker 2.0 models
The CNC carving module on Snapmaker 2.0 is powered by a DC motor with a speed range of 6,000 – 12,000 RPM.
The module comes with an ER11 collet capable of holding CNC bit diameters ranging from 0.5mm to 6.35 mm (0.02″ – 0.25″).
In addition, it also comes with an MDF workbed and a set of clamps for work holding. Wood, acrylic, PCB, carbon fiber sheet, jade, etc., are some of the materials it can process.
Snapmaker also provides a flat and a ball end mill with the machine to get you started.
The CNC module does not have the auto Z feature, and you need to set Z-height manually using the calibration card or a piece of paper.
Transmission/Linear drive

The gantries use lead screw drives on all of the axes. The lead screws are paired with multiple stepper motors, making it really accurate.
It has a unique build and comes loaded with TMC2209 stepper motor driver chips embedded into PCBs that power the stepper motor.
Snapmaker uses lead screws with an 8 mm pitch on the Z-axis and a 20 mm pitch on the X and Y-axis. This is to get a tight resolution on the Z-axis for 3D printing.
The pitch of a lead screw is the spacing between the threads. So if the pitch is higher, your axis will move further per turn, meaning it will be faster, but it also limits the smallest distance you can move your axis.
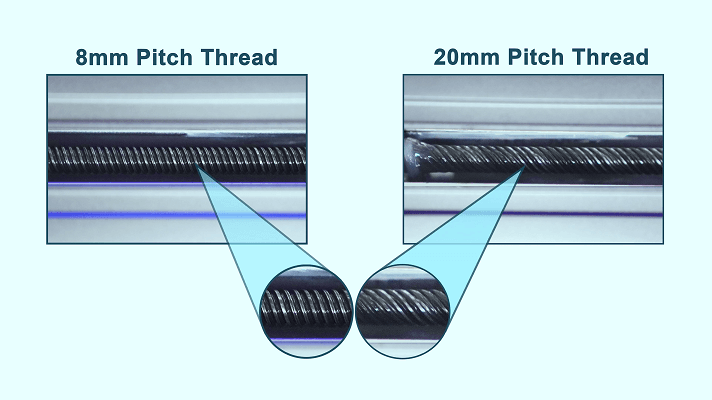
On the Snapmaker AT and F models, the smallest distance you can move your Z axis is 0.05mm. On the X and Y axis, it’s 0.1 mm.
The lead screw, including the stepper motor, is housed inside the linear module and is sealed with metal ribbons that keep the dust and debris out.
It really helps when you use Snapmaker as a CNC router which involves a lot of dust and debris.
Snapmaker 2.0’s work bed moves on the Y-axis while the tool head moves on the X and the Z-axis.
Controller and Electronics
Controller
The controller of Snapmaker 2.0 is attached to the Z-axis column using four M4 x 30 screws. Its ports use custom connectors that are covered with dust plugs for protection.
You can directly connect the axis cables, touch screen controller, USB, heated pad, power module, tool modules, and other add-ons like E-stop, air purifier, etc., to the controller.
The controller runs on Snapmaker’s proprietary firmware, “Snapmaker2-Controller”.
It uses the Controller Area Network (CAN bus) protocol to communicate with different machine parts. CAN delivers high-speed communication at a low cost.
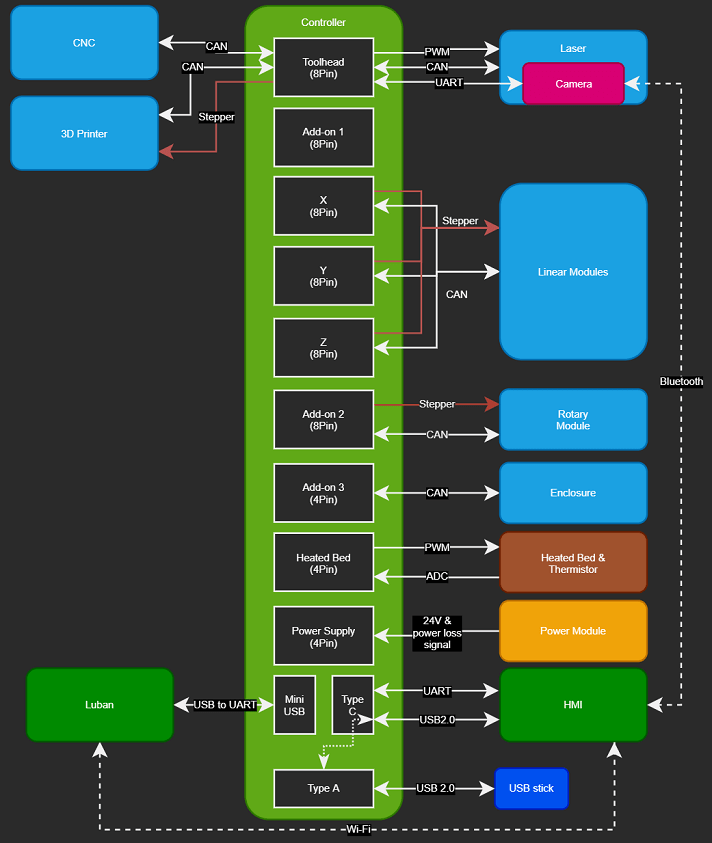
The CAN module is what allows Snapmaker to have different modular accessories.
It has ports for add-ons and modules that allow you to simply plug in the module and start using it without worrying about configuring.
Stepper Motors
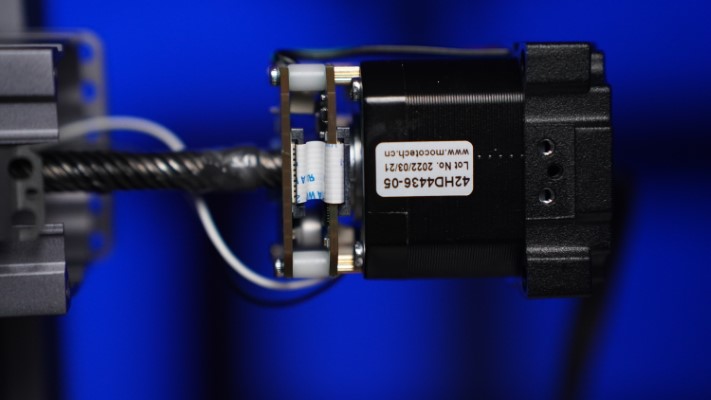
Snapmaker 2.0 uses five NEMA 17 stepper motors. One for the X-axis, two for Y, and two for the Z-axis.
The stepper motors are hidden within the linear modules and use the TMC2209 stepper drivers.
Power Supply Unit (PSU)
Snapmaker 2.0 comes with a separate PSU for powering the machine. It has an in-built cooling fan that automatically changes its cooling intensity depending on the workload.
Touchscreen Controller
Snapmaker 2.0 comes with a touchscreen controller running on Android OS. It connects to the online controller through a flexible cable and sits on a magnetic base.
Using it, you can run the machine offline by selecting and running the jobs from the flash drive.
Software
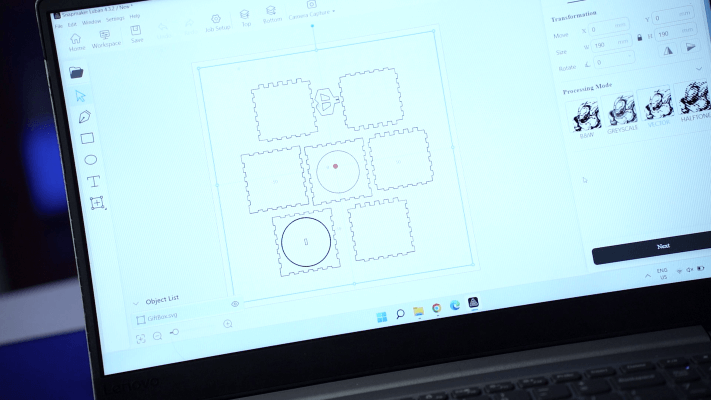
Snapmaker 2.0 works with their own software called “Luban“. It’s open-source software that’s available free for anyone to use.
You can install it on Windows 8/10, macOS, and Linux operating systems. It requires the system to have at least 4GB of RAM to run smooth.
Luban has a smooth interface that allows you to switch between 3D printing, laser engraving, and CNC carving environments.
For various operations, Luban uses the following file formats to generate G-codes.
- STL
- OBJ
- SVG
- JPEG
- PNG
You can then send the generated G-code to the controller via WiFi or flash drive.
You also have the flexibility to operate Snapmaker 2.0 using third-party software like LightBurn, ArtCAM, Aspire, FreeCAD, Fusion 360, and Vcarve.
If your machine connects to the software but does not budge, it mostly has to do with improper Baud rate setting.
Baud rate is the speed at which the software talks to the machine, so if the software doesn’t speak at a speed that the machine can understand, it won’t move.
When using LighBurn software with Snapmaker 2.0, set the Baud rate as 115200 for the Snapmaker to work.
Accessories
Filament

Snapmaker provides you with a 1Kg spool of 1.75 dia Black PLA filament in the kit. It is a degradable grade filament made from corn extracts.
You can also get replacement filaments from Snapmaker’s website. They are available in multiple colors.
Safety Goggles
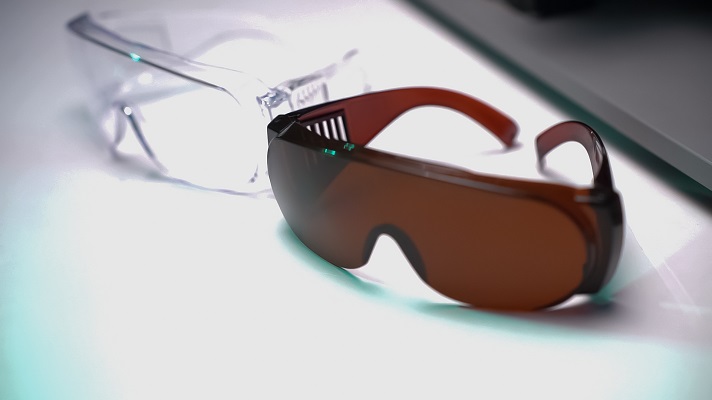
With Snapmaker 2.0, you’ll get two safety goggles. One for protecting your eye from airborne projectiles while CNC milling and the other to shield your eyes from the laser beam.
Toolbox

The toolbox has all the necessary tools to assemble Snapmaker 2.0. Following is the list of components in the toolbox.
| Component | Number of items |
|---|---|
| M4 x 30 Screw | 12 |
| M4 x 10 Hex Socket Head Screw | 17 |
| M4 x 8 Screw | 68 |
| M4 x 10 Hex Flat Head Screw | 22 |
| M4 x 70 Screw | 4 |
| Wing Nut | 4 |
| Foot with M4 x 10 Hex Socket Head Screw | 4 |
| ER11 Collet, ER11 Nut | 1 |
| Divider | 6 |
| Cable Holder | 1 |
| Hot End Kit | 1 |
| Tweezers | 1 |
| Flat End Mill | 1 |
| Ball End Mill | 1 |
| Cable Tie | 1 |
| Silicone Plug | 8 |
| USB Disk | 1 |
| 17mm Open-End Wrench | 1 |
| 14mm Open-End Wrench | 1 |
| Palette Knife | 1 |
| Diagonal Pliers | 1 |
| Screwdriver | 1 |
List of tools that come with Snapmaker 2.0
Materials
Snapmaker 2.0 comes with a material box that contains some laser materials, CNC materials, a calibration card, and a wiping cloth.
You can use CNC and laser materials to test the machine’s performance after assembly.
Assembly
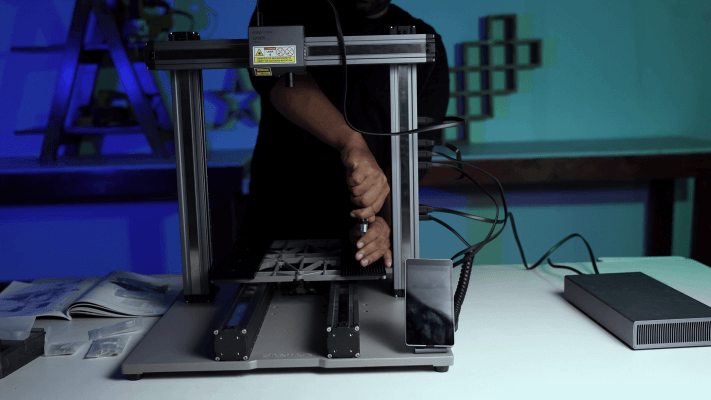
Snapmaker 2.0 come in separate parts, and you need to assemble it. Assembly instructions are provided in the user manual that comes with the machine.
The assembly manual is very detailed and has illustrations of all the steps which makes assembling the machine a fun task.
However, there are lots of parts that you need to put together, and assembling the machine can take around 3-4 hours.
Upgrade
Enclosure and Air Purifier
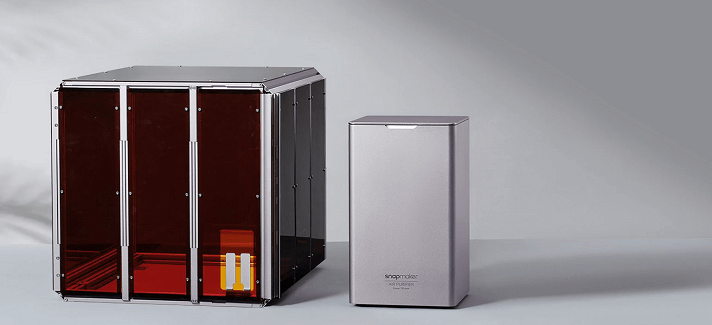
Snapmaker has an enclosure available that you can use on Snapmaker 2.0. It helps reduce noise, isolate dust, and block laser beams.
The enclosure has trifold magnetic doors with hall sensors to detect the opening and closing of the door. If you open the doors when the laser is running, the controller will cut power to the laser immediately.
An exhaust fan is also there on the enclosure that timely removes the smoke from the work area.
If you want to collect and filter the smoke emitted from your Snapmaker, you can use an air purifier. Snapmaker has one available on their website.
Rotary Module
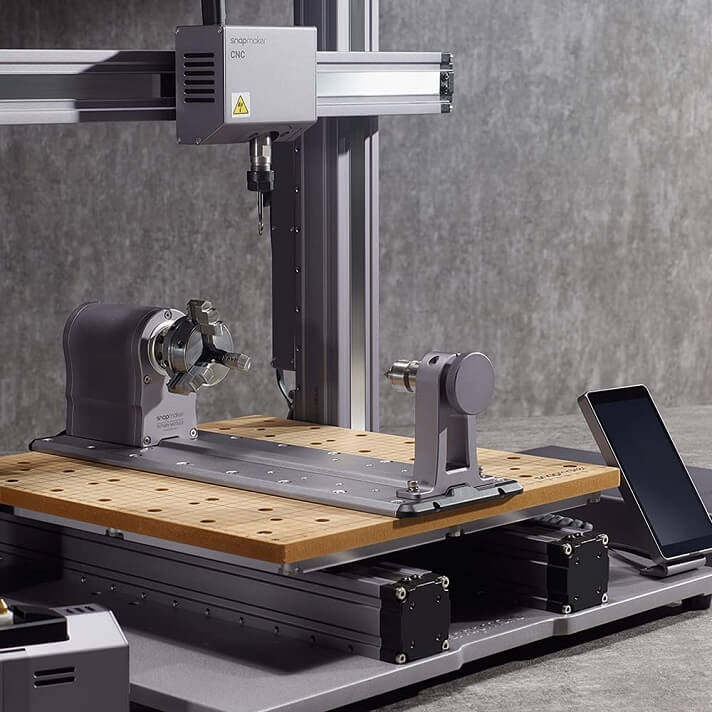
Snapmaker has a rotary module available that you can use to turn your Snapmaker 2.0 into a 4-axis machine.
The module can house workpieces up to a maximum of 8.85″ (225mm) in length and 2.67″ (68mm) in diameter without the tailstock in place.
With the tailstock, its material length capability decreases to 6.69″ (170mm).
CAN Hub
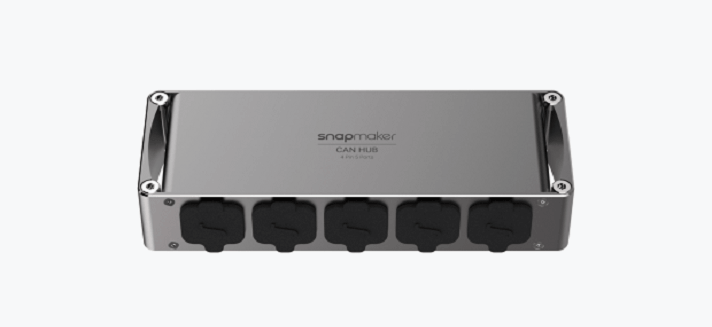
CAN Hub is a 4-in1 docking station for Snapmaker 2.0. It has one input port and four output ports.
You can connect all your addons to the docking station and reduce the load on the controller. It can be mounted onto the Snapmaker 2.0’s linear column or enclosure.
Emergency Stop Button
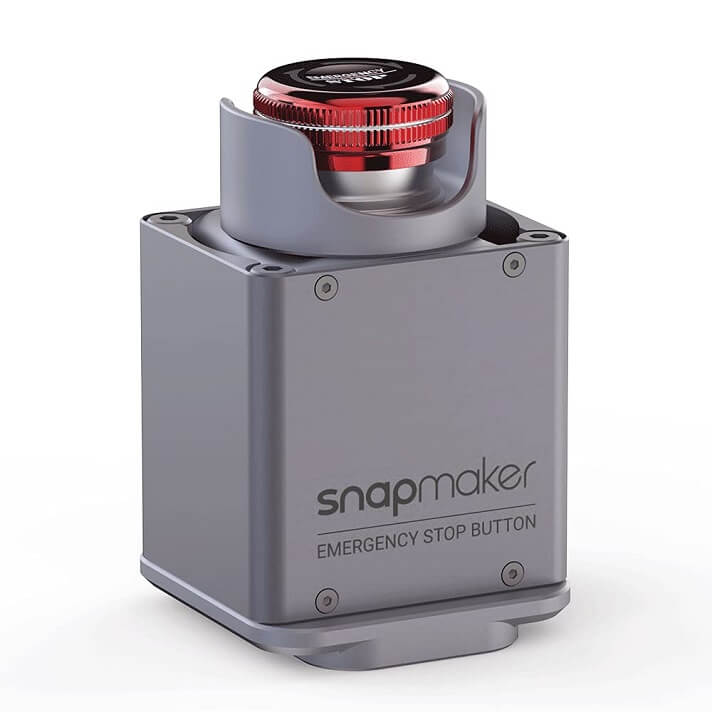
With an emergency stop button attached to the Snapmaker 2.0, you can get an additional layer of safety.
It breaks the circuit and halts the machine’s operation with a press of the E-stop button.
Note that Snapmaker 2.0 has power loss recovery capability, allowing it to resume jobs from where it left off.
10W High Power Laser Module
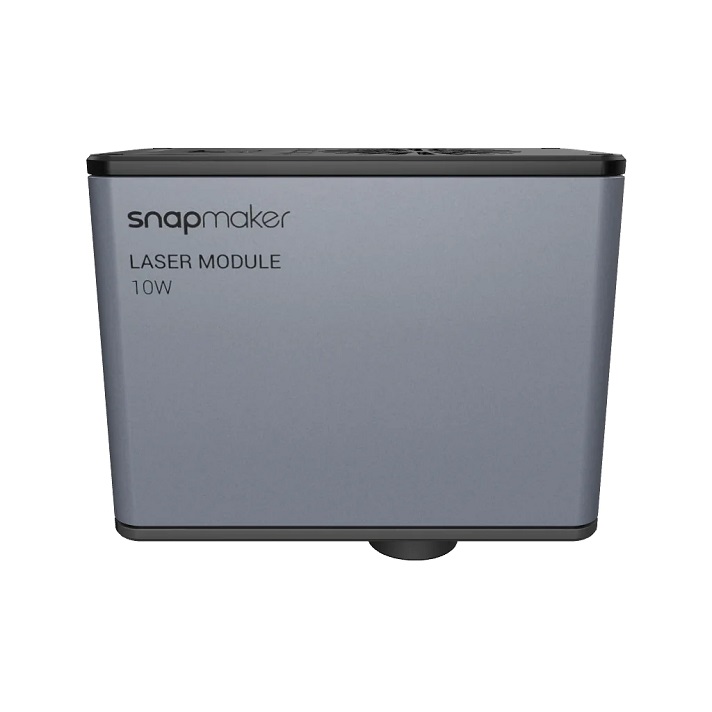
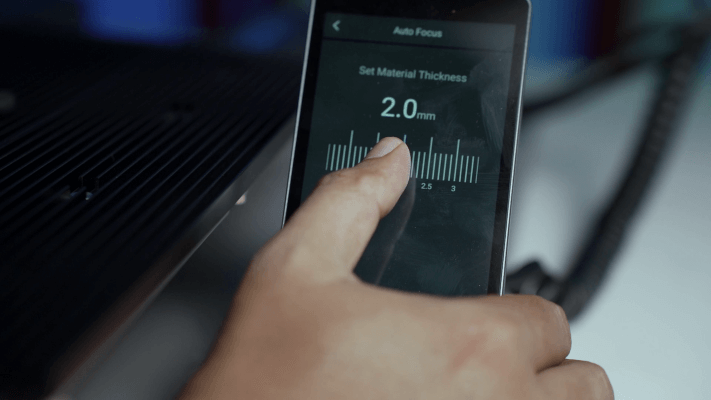
Snapmaker has recently released a 10W laser module for Snapmaker 2.0 with upgraded camera capture, autofocus, and improved software.
The 10W uses Fast-axis Collimating (FAC) lenses to compress and focus the laser spot to 0.05 mm × 0.2 mm.
The small laser spot of 10W allows for more energy concentration so that you can complete the jobs faster than regular 10W lasers.
With the 10W laser module, you can work on stainless steel, anodized aluminum, stone, and glass.
Community
Snapmaker has a large and active community participating across its forum, Facebook group, and contest page.
You can also take part in these platforms to join the discussions and connect with other makers.
The forum has a lot of helpful resources that you can access.
Customer Support
Snapmaker provides good support to their customers through the Snapmaker Academy, where you can learn and troubleshoot most of the issues that may occur with your machine.
They also provide a one-year warranty for Snapmaker 2.0. For queries, you can contact them through email or phone.
Difference between A, AT, and F models of Snapmaker 2.0
Snapmaker 2.0 has A, AT, and F models available. These can confuse someone new looking through their differences.
To simplify the differences, I’ve compared them using a table.
| A Models | AT Models | F Models |
|---|---|---|
| Snapmaker 2.0 A150 | Snapmaker 2.0 A250T | Snapmaker 2.0 F250 |
| Snapmaker 2.0 A250 | Snapmaker 2.0 A350T | Snapmaker 2.0 F350 |
| Snapmaker 2.0 A350 |
Snapmaker 2.0 machine variants with A, AT, and F models available
| A150/A250/A350 | A250T/A350T | F250/F350 | |
|---|---|---|---|
| 3D printing | ✓ | ✓ | ✓ |
| 3D module cooling system | X | ✓ | ✓ |
| Laser engraving | ✓ | ✓ | X |
| CNC carving | ✓ | ✓ | X |
| Power module cooling optimization | X | ✓ | ✓ |
| Linear module motor driver chip | TB67S109 | TMC2209 | TMC2209 |
| X-Axis linear module lead | 8mm | 20mm | 20mm |
| Y-Axis linear module lead | 8mm | 20mm | 20mm |
| Z-Axis linear module lead | 8mm | 8mm | 8mm |
| Price starts from | $1,039 | $1,499 | $999 |
Comparison table of Snapmaker 2.0 A, AT, and F models
Primarily the difference between the A, AT, and F models of Snapmaker 2.0 is in their liner rails, cooling, driver chip, 3D printing, laser engraving, and CNC carving capabilities.
Note that the F model doesn’t have a laser module, CNC module, or related components like safety goggles.
A model comes with all the modules, but its linear rails have an 8mm pitch. This means it’s slower, and the stepper drivers are also less efficient than those on AT and F.
Also, it uses a different driver chip and lacks a cooling system for the 3D and power module.
These differences also are reflected in their price. F models are priced lower compared to others.
The A model is around $460 cheaper than the AT and costs about $40 more than the F model of Snapmaker 2.0.
So, if you are focused only on 3D printing, the F model is better for you.
You can get the A or AT model if you need all three modules. The AT model is more expensive than the A but is faster and more efficient.
Snapmaker 2.0 vs Original – What changed?
| Snapmaker 2.0 | Snapmaker Original | |
|---|---|---|
| Variants | 3 | 1 |
| Size | Large | Small |
| Recommended For | Professionals | Beginners |
| Data Transmission | Wi-Fi, USB Cable | USB Cable |
| Touchscreen | 5″ | 3.5″ |
| Enclosed Linear Module | Available | Not Available |
| Auto-Leveling | Available | Not Available |
| Built-in Camera | Available | Not Available |
| Laser Power | 1.6W (1600mW) (add-on 10W available) | 0.2W (200mW) |
| Wavelength | 450nm | 405nm |
| Nozzle Temperature Threshold | 275℃ | 250℃ |
| Filament Runout Recovery | Available | Not Available |
| Supported Filament Materials | PLA, ABS, PETG, TPU | PLA, ABS |
| Spindle Speed Regulation | Available | Not Available |
| Spindle Speed | 6,000 -12,000 RPM | 19,000 RPM |
| Warranty | 1 year | 1 year |
A quick comparison of Snapmaker 2.0 and Snapmaker Original
Both Original and 2.0 have differences in connectivity, machining capability, and size.
Snapmaker Orginal was Snapmaker’s introductory machine. Since the release of Snapmaker 2.0, Original has been lacking a lot of important software updates, which also reduces its performance.
On the other hand, 2.0 has been flooded with updates and follow-up updates. So if you are planning to get a Snapmaker, 2.0 will be your best bet.
Testing Snapmaker 2.0 (A350) – What can it make?
I used the Snapmaker 2.0 to make a bunch of stuff and the results were good but it also had some setbacks.
Laser Cutting Plywood

Snapmaker was able to cut 2mm thick plywood in about 3 passes going at about 300 mm/min the cuts were sharp and clean.
Laser Engraving
I used Snapmaker to engrave on a phone case and on a Ukulele which turned out good.
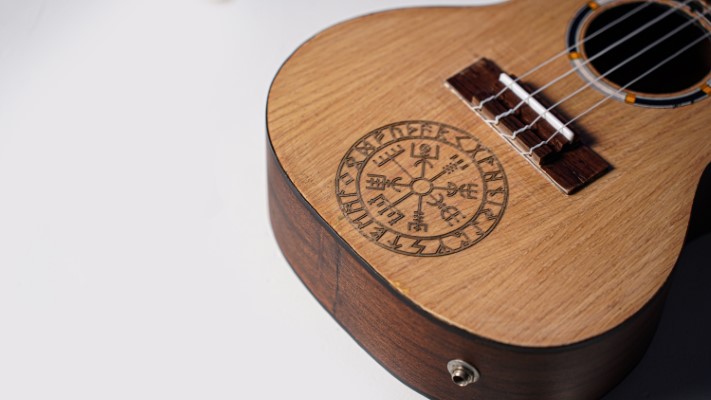
The details on the ukulele were not as expected because it had a lacquer coating on it.
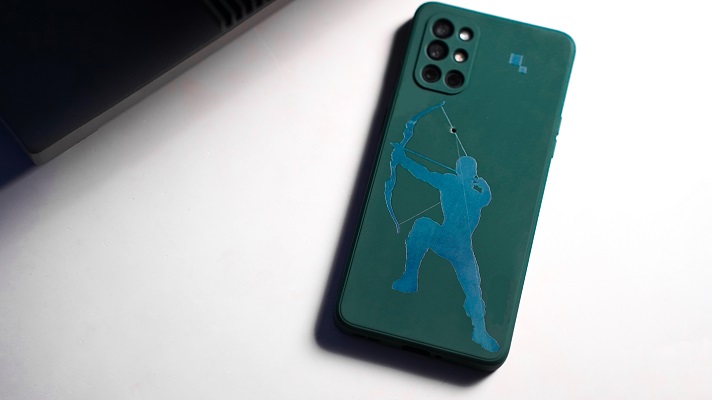
The engraving on the phone cover had a sharp edge with no edge burn and had a uniform engraving.
CNC Cutting
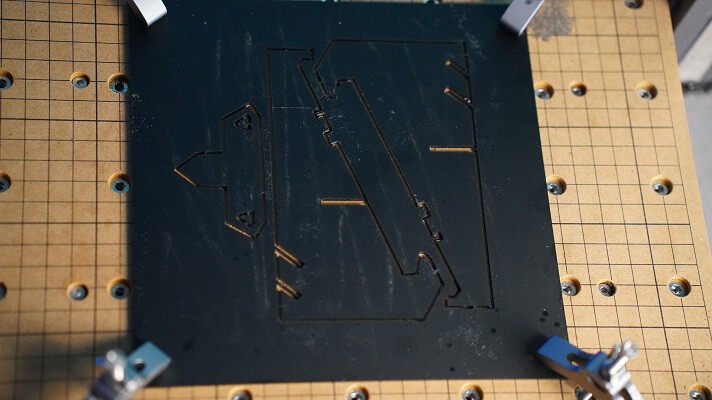
Snapmaker 2.0 was able to cut acrylic at a feed rate of 300 mm/min at a depth of 0.4mm per pass using a 1.5 mm thick single flute flat end mill.
The cuts were good, there were no vibrations and it didn’t bog down the spindle at any point.
While routing pine at a depth of cut of 2mm and a feed of 500mm/min the spindle bogged down in some places but the machine handled the cuts well.
However, the safer limit for cutting softwood is around 300 mm/min when cutting at a depth of 2mm.
3D Printing

Snapmaker took around 3 hours to print a 6-inch tall Eiffel tower replica using the fast preset.
Even on the fast preset, the details are good and there is no stringing.
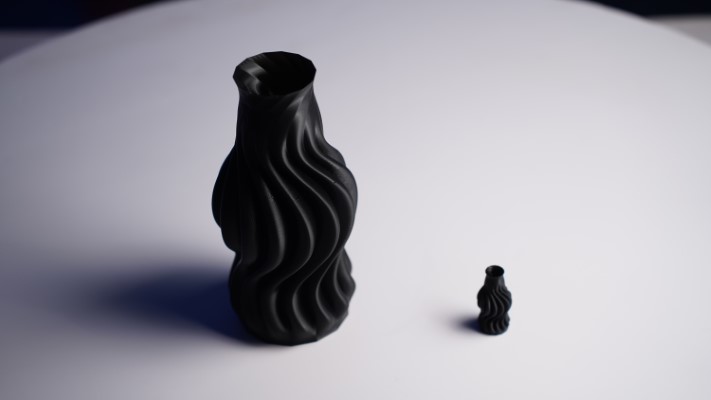
The high-quality preset gives really good print quality but it will take some time to do so. A 2″ vase model took about 37 minutes to complete using the high-quality preset.
But you can also play around with the preset to get a balance between speed and quality and after a few minutes of tweaking the settings, the Snapmaker was able to print a 19 cm tall vase in about 3 hours and 15 minutes.
Final Thoughts – Is Snapmaker 2.0 worth it?
3-in-1 machines are a great option for those who want to do more than one type of work.
It is a cost-effective way to get the equipment you need without having to buy three different machines.
Snapmaker 2.0 is a versatile machine. You can use it for CNC milling, laser engraving/cutting, and 3D printing applications.
As a laser, the Snapmaker provides good quality output, but you will need the $500 10W laser upgrade to work with harder materials and get jobs done quickly.
The lead screw drives on all axes will not be as fast as a belt-driven machine, but the results will be much more accurate.
As a CNC, if you work with small workpieces, Snapmaker can give you good results with good tolerances.
The work area is a limitation for large workpieces, and the speed at which it can cut does not match the speed of a dedicated CNC in a similar price range.
As a 3D printer, the print quality, the build volume, and the software package make Snapmaker a good purchase.
Overall if you need a dedicated machine for laser cutting or CNC routing, there are better machines out there that do a better job at a similar price.
But if you are a hobbyist or DIY enthusiast trying to bring your creative ideas to life, the Snapmaker 2.0 is a 3-in-1 solution for you.
It takes up less space than three dedicated machines and lets you do most things you need for prototyping.
Frequently Asked Questions
What can you do with a Snapmaker?
With Snapmaker, you can make light projects that are possible with a 3D printer, laser engraver, and a CNC router/mill. It is a great tool for DIY enthusiasts.
Can Snapmaker 2.0 engrave or cut metal?
Yes, Snapmaker 2.0 can engrave and cut thin metal pieces with their newly released 10W high-power laser module and end mill. The result you get will depend on the hardness and thickness of the metal you work on. For carving, aluminum and brass are good options.
How much does Snapmaker cost?
Snapmaker’s price varies from $450 to $1,799 depending on the machine’s size and the variant you plan to buy. In addition, you’ll have to bear extra costs for getting add-on parts and replacements.