


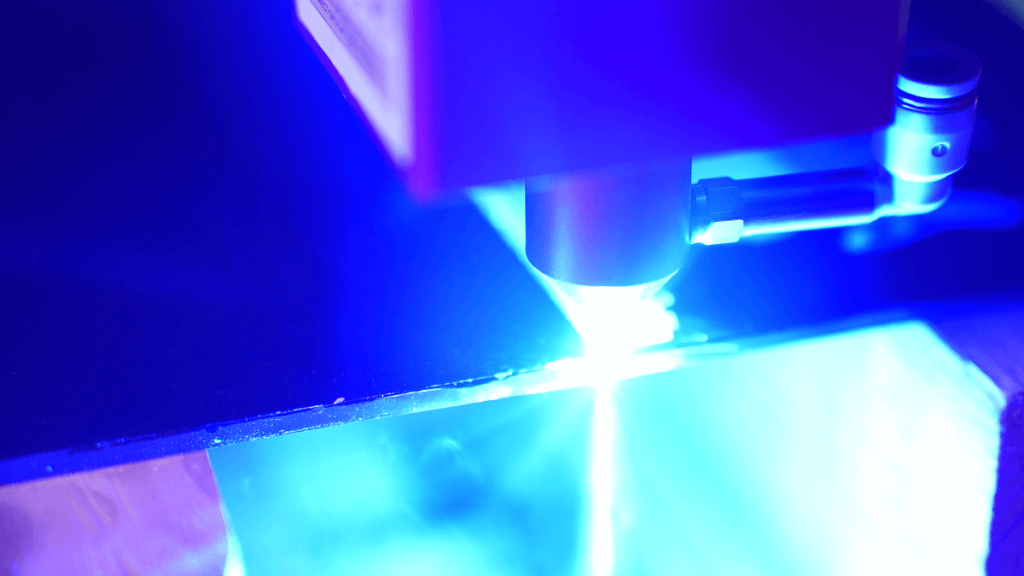
Laser-engraved glass is an excellent project that can be used to create a variety of products.
However, glass can be tricky to engrave as a diode laser passes straight through it without engraving it.
In contrast, a CO2 laser can engrave glass easily but makes it prone to chipping and cracking.
This article discusses the process of laser engraving and etching glass in detail and explains how you can get excellent results with your CO2 or diode laser.
MellowPine is reader-supported. When you buy through links on my site, I may earn an affiliate commission at no extra cost to you.
Laser Etching and Engraving Glass- The Basics
Laser etching and engraving glass produces a permanent mark with a frosted look.
Unlike other materials, where the laser removes some material to produce the engraving, laser engraving glass alters the material by producing micro-fractures.
Although laser etching or engraving glass can throw up some challenges, there are various techniques you can learn to improve the quality of your engraving.
By following the right technique, setting the right process parameters, and ensuring good process control, you can even use your laser to engrave wine bottles for customized projects.
The following video provides a detailed guide to engraving glass using a diode laser.

The Process – Laser Etching and Engraving Glass
Step 1: Create the Design
To get good engraving or etching results on glass, you have to optimize the images to reduce the risk of crowded fractures.
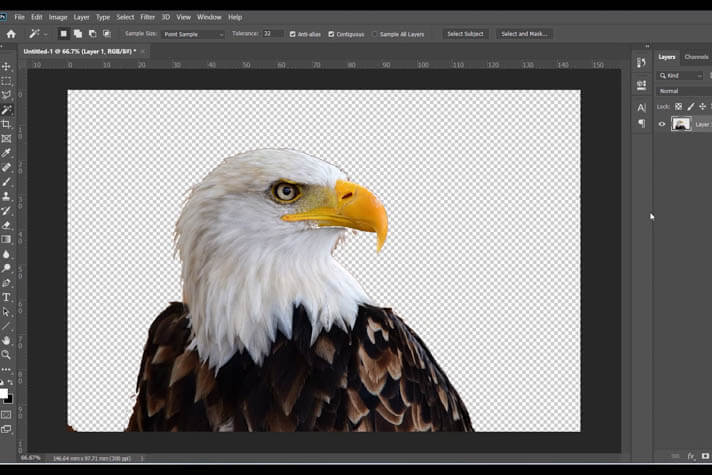
The very first thing you need to do is to remove the background or any unwanted details from the image.
This is because engraving a crowded background will require multiple micro-fractures, which can affect the visibility of the actual subject.
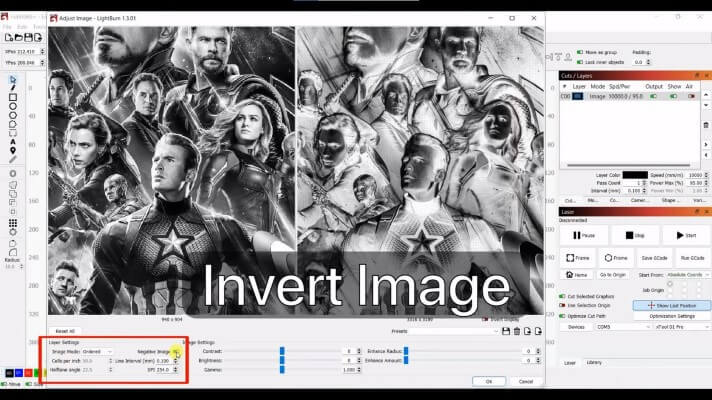
Apart from that, laser engraving glass produces white marks (instead of black), so in most cases, you will need to invert the design to make sure that the laser marks the white area of the design and not the black area.
Image Settings for Laser Engraving Glass
| Parameter | Setting |
|---|---|
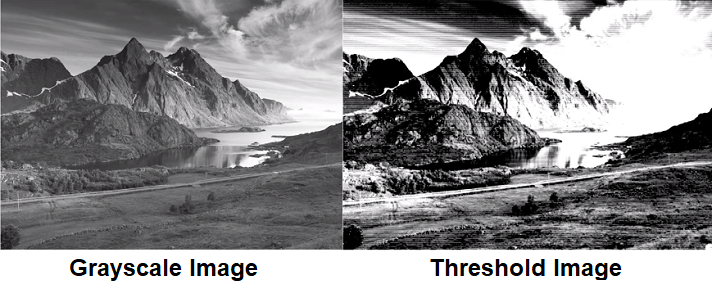
| Image Mode | Use Threshold instead of Grayscale |
| Resolution | 300 DPI |
| Rasterization Type | Ordered Dithering |
Recommended image settings for laser engraving glass
Generally, using grayscale mode alters the laser power to produce different levels of black. However, when engraving glass, controlling the intensity of fracture by altering the power can be extremely complicated.
As a result, it is preferable to use a threshold mode or an Ordered Dithering mode for laser engraving images on glass.
Image Settings for Laser Etching Glass
| Parameter | Setting |
|---|---|
| Grayscale | 80% Black |
| Resolution | 254 DPI |
| Rasterization Type | Jarvis Dithering or Grayscale |
Recommended image settings for laser etching glass
Unlike engraving, laser etching glass involves adding a coating or layer over the glass that you can engrave to produce the required pattern.
This method is commonly used for engraving mirrors, where you remove the reflective coating to produce the required design.
You can also use this method to engrave grayscale images on glass by painting the glass black.
For laser etching glass, images optimized to 80% grayscale and resolution set to 254 DPI or higher work best.
Step 2: Prepare the Workpiece
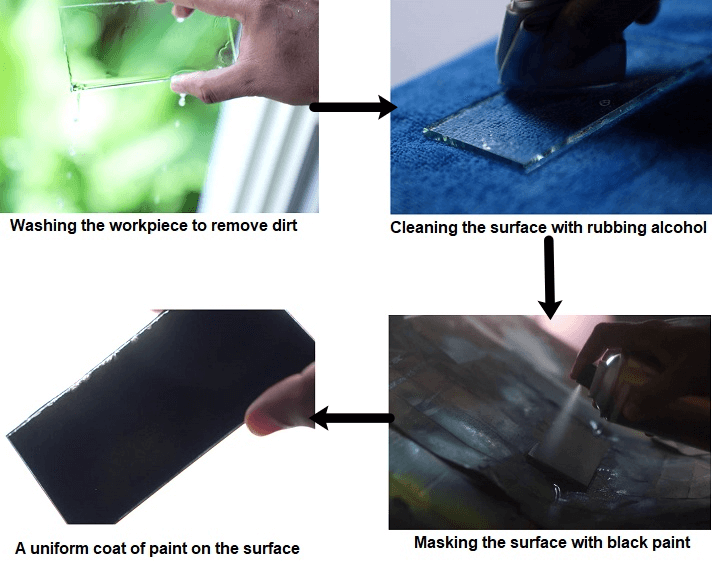
Before placing the glass piece on the workbed, make sure it’s well-cleaned and is free of dust or oil pigments.
You can use glass cleaners like Windex and follow it with a denatured alcohol cleaning.
While a CO2 laser can engrave glass without any transfer medium, placing a dampened paper towel over the surface of the glass produces white frosted engravings.
For grayish engravings, you can apply masking tape over the glass surface.
When applying masking tape, it must be ensured that no air bubbles are trapped between the masking tape and the glass surface.
In contrast, when using a diode laser, you need to apply a uniform coat of black paint, which makes the workpiece opaque and acts as a transfer medium to engrave the glass.
To avoid uneven results when using black paint to mask the surface, the engraving should be performed with the non-coated face toward the laser.
This requires you to mirror the design pattern before executing the process.
Another alternative is to place the glass on a black cardstock and engrave it. However, this method is not ideal for intricate engravings.
Step 3: Set the Optimal Laser Parameters
Before executing the cut, you need to set the optimal parameters for laser etching and engraving glass.
The optimal parameters for laser engraving and etching glass are given in the tables below.
| Parameter | Setting |
|---|---|
| Output Power | 10W and above |
| Laser Type | CO2 or Diode laser |
| Engraving Speed | ~1500 mm/min with a 10W diode laser |
| Masking | Black Paint or Cardstock for diode laser |
| Air Assist | Not required |
Optimal settings for laser engraving glass
1. Perform Test Runs
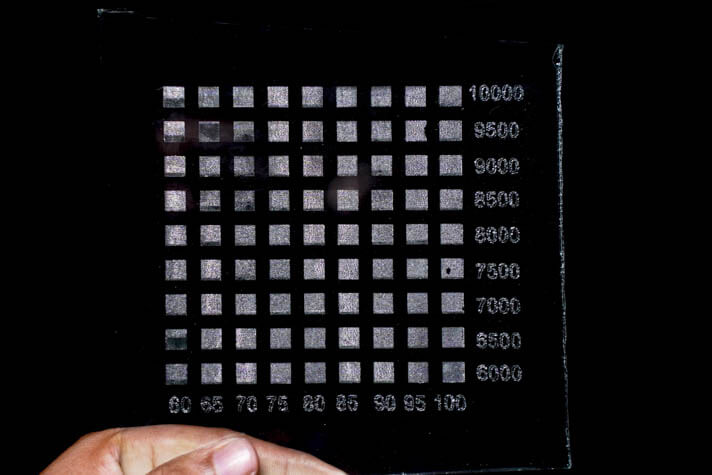
The optimal parameter for laser etching and engraving vary from one setup to another and from one type of glass to another.
Therefore, it is recommended that you perform test runs on the glass that you plan to use for your job.
You can switch between different power, speed, and image parameters to find the settings that produce the optimal results.
Testing the materials beforehand helps you understand them better, and once you have the proper settings, you can run the job.
2. Set the Optimal Laser Power and Speed
When using a 55W CO2 laser, I used 20% power at 200mm/s speed to etch the back of a mirror, and at 200 mm/s speed and 50% power, I was able to get a frosty white engraving on glass.
On the other hand, I was able to engrave glass with my 10W diode laser at 100% power and 1500 mm/min speed.
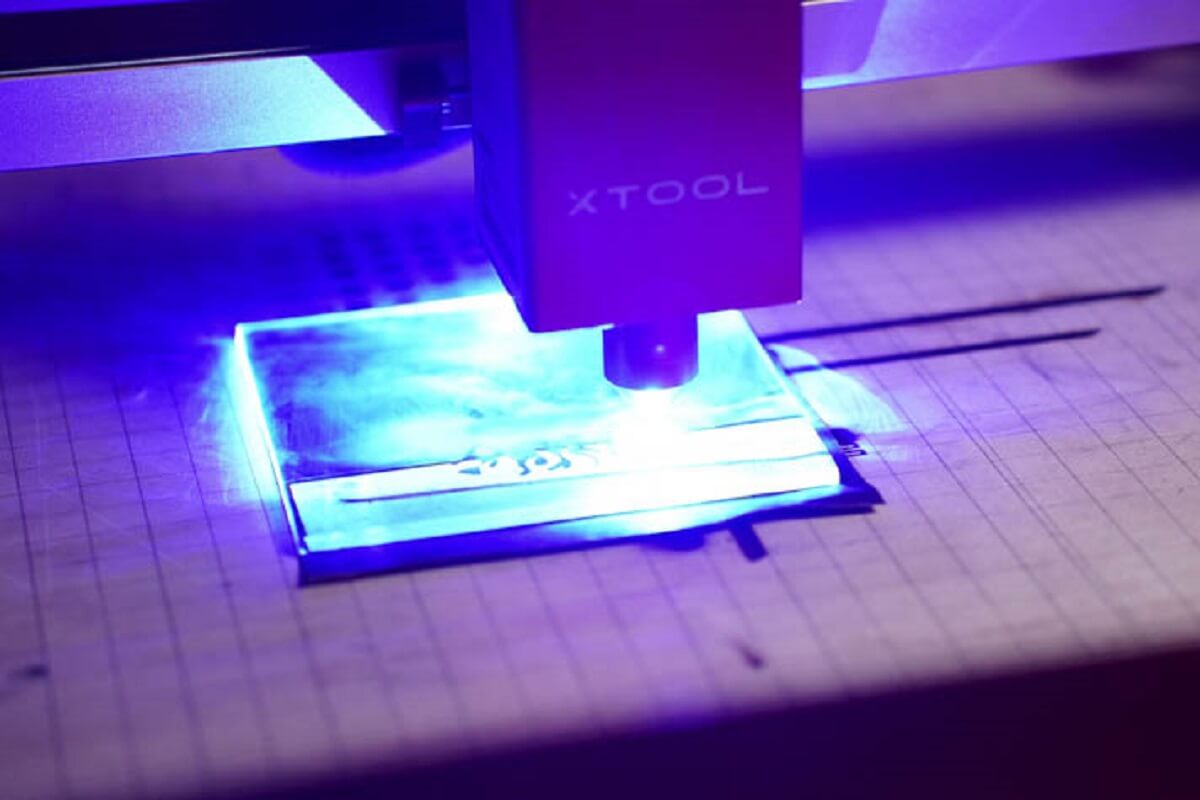
Similarly, with my 20W xTool D1 pro diode laser, I used 8000 mm/min and 100% power to engrave glass.
However, the results were a bit extreme, and a slightly higher speed and lower power should yield better results for a 20W laser.
Therefore, it is always recommended to perform test runs and select the best power and speed configuration for your laser setup.
3. Set Proper Laser Focus
Glass is a sensitive material, and it needs to be kept at the right focus plane of a laser beam.
If you deviate from the focus, you’ll get flacking, chipping, and irregular fracturing on the glass surface.
When using a diode laser, it is important to set the laser focus on the surface that is in contact with the transfer medium.
For example, when the glass is placed on top of the cardstock, the bottom surface of the glass is in contact with the transfer medium, and the design will be engraved on the bottom side of the glass.
So, in that case, the laser focus should be set at the bottom face of the glass (which is in contact with the transfer medium).
4. Use Appropriate Air Assist
Air assist is generally not required for etching or engraving glass. But if you have an adjustable pump, you can adjust it to low-pressure mode.
This helps remove any surface debris and also cools the glass surface.
Using a very high-pressure air assist can result in rapid cooling, causing unwanted fractures in the glass.
Step 4: Execute the Process
Once you set the right parameters, you can frame the design and execute the engraving process.
When engraving glass, it is important to elevate the glass from the work area because the laser will pass through the glass and burn the material underneath.
This can cause smoke stains on the back of the glass and ruin the engraving.
Supporting the glass at the edges and elevating it allows the smoke to easily escape the cutting area, preventing it from staining the glass.
Step 5: Post-Processing
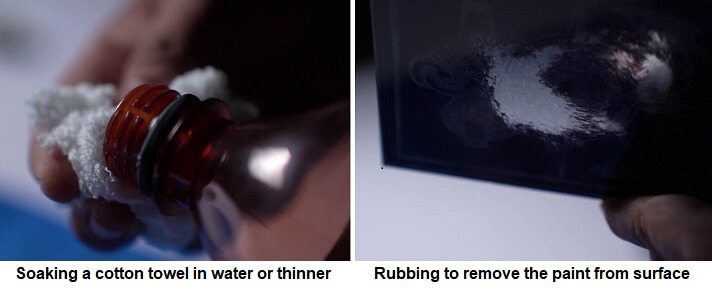
Laser etched or engraved glass needs further processing to remove the masking layer, paint, and shards from its surface.
The masking layer can be gently removed by hand, but you need to wash it or slowly rub it using a moist cloth to remove the paint.
Shards are a little tricky to remove. They can be sharp, so use cut-resistant gloves while handling such glass pieces.
To effectively remove the shards and retain a polished surface, you can use a wire brush to clean the etched or engraved surface.
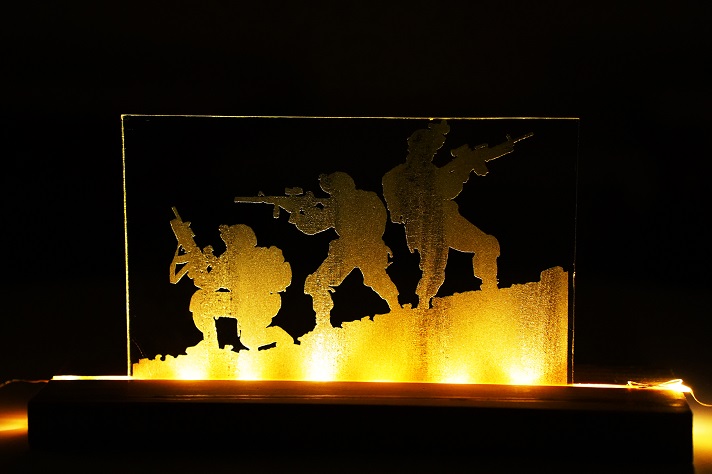
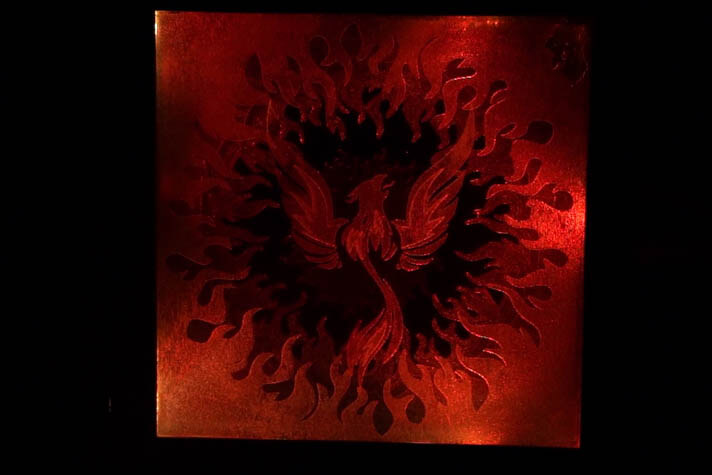
You can also use an led light to highlight the engraving pattern, making it ideal for projects such as desk lamps.
Glass that can’t be Laser Etched or Engraved
Glass containing metal additives such as lead, zinc, gold, etc., can’t be etched or engraved on a CO2 laser as they are not good at working with metals.
Even fiber lasers that are good at processing metals can’t work on metal-doped glass. This is because laser beams from fiber lasers easily pass through glass.
As the fiber laser beams pass through the metal-doped glass, the metal heats and expands, causing uneven fractures and eventually breaking the glass.
Final Thoughts
Both laser etching and engraving are great ways to mark on glass.
When working with delicate glass, you can use laser etching to remove the surface coating from the glass, whereas laser engraving can be used when you want a frosty white engraving on clear glass.
Etching and engraving glass with a laser has many advantages over traditional techniques, and such glasses are used in many different applications.
Furthermore, the non-contact nature and ability to produce intricate patterns without chipping the glass makes laser etching and engraving ideal for producing permanent marks on fragile glass workpieces.
Laser Cutting and Engraving Other Materials
Following are some detailed guides on laser cutting and engraving different materials.
| Material | Link to Guide |
|---|---|
| Vinyl | Laser Cutting Vinyl |
| Plywood | Laser Cutting Plywood |
| Aluminum | Laser Cutting and Engraving Aluminum |
| Leather | Laser Cutting and Engraving Leather |
| Fabric | Laser Cutting Fabric |
| Foam | Laser Cutting Foam |
| Plastic | Laser Cutting and Engraving Plastic |
| Polypropylene | Laser cutting polypropylene |
| Brass | Laser Engraving Brass |
| Felt | Laser Cutting Felt |
| Granite | Laser Engraving Granite |
| Metal | Laser Cutting Metal |
| Glass (cutting) | Laser Cutting Glass |
| Glass (engraving) | Laser Etching and Engraving Glass |
| Wood (cutting) | Laser Cutting Wood |
| Wood (engraving) | Wood Laser Engraving |
Laser engraving and cutting guides for other materials
Frequently Asked Questions
Where should I place the wet paper towel while etching glass, inside or outside the glass?
You should place the wet paper towel on the surface of the glass while etching it. The goal of placing wet paper towels outside the glass surface is to minimize the surface heat and keep the fracturing effect from affecting the glass much. Placing the wet paper towel inside the glass won’t help dissipate the heat or control the effect of fracturing.
Can I leaser engrave on porcelain?
Yes, you can laser engrave porcelain. It can be laser engraved with the same settings used for glass, but it tends to give engraves with less contrast. Porcelain is very similar to glass and its composites.
What are the types of glasses that can be laser etched or engraved?
With a laser, you can etch or engrave on glasses like soda-lime, aluminosilicate, borosilicate, stained, pressed/molded, sheet, mirror, etc.